Features1
Easy to integrate... just point the image that should be handled and pass the url of the large image.
Preloads large zoomed images
Customise viewer and image wrapper with CSS
Add Your own HTML into viewer to customise it even more
Integration
Before integration, You will need to prepare two images.
The large one to display zoomed details, and the small one with lower resolution.
1. Import JavaScript and CSS definitions into Your website code.
<script type="text/javascript" src="mglass.js"></script>
<link rel="stylesheet" type="text/css" href="mglass.css"/>
2. Define small image tag. Remeber to give it an uniqe ID.
<img id="my_image" src="images/small_image.jpg" width="400" height="116" alt="" border="0"/>
3. Add this JavaScript code:
<script type="text/javascript">
new MGlass("my_image","images/large_image.jpg");
</script>
But that's just a basic usage. See the examples below to find out how to customise it.
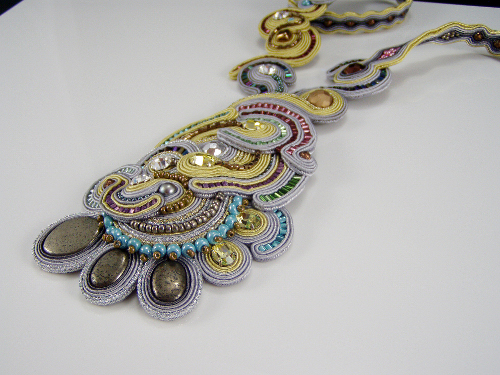
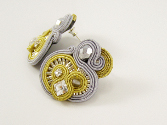
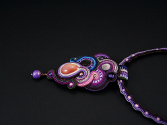
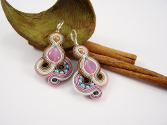
Zoom product details2
This solution seems to be perfect for products presentation by on-line stores.
Click this button below to see code for this example. It shows how to handle multiple images with the same viewer style.
Show code
<img id="margitaradziewicz2" src="images/min_margitaradziewicz2.jpg" width="500" height="375" alt="" border="0"/>
<img id="margitaradziewicz4" src="images/min_margitaradziewicz4.jpg" width="167" height="125" alt="" border="0"/>
<img id="margitaradziewicz1" src="images/min_margitaradziewicz1.jpg" width="167" height="125" alt="" border="0"/>
<img id="margitaradziewicz3" src="images/min_margitaradziewicz3.jpg" width="167" height="125" alt="" border="0"/>

<style type="text/css">
	.mglass_wrapper {
		margin: 0px auto;
	}
	.mglass_viewer {
		width: 150px;
		height: 150px;
		-moz-border-radius: 100px;
		-webkit-border-radius: 100px;
		-khtml-border-radius: 100px;
		border-radius: 100px;
		-moz-box-shadow: 15px 15px 30px #000000;
		-webkit-box-shadow: 15px 15px 30px #000000;
		box-shadow: 15px 15px 30px #000000;
	}
</style>

<script type="text/javascript">
	var mr1 = new MGlass("margitaradziewicz1","images/avg_margitaradziewicz1.jpg");
	var mr2 = new MGlass("margitaradziewicz2","images/avg_margitaradziewicz2.jpg");
	var mr3 = new MGlass("margitaradziewicz3","images/avg_margitaradziewicz3.jpg");
	var mr4 = new MGlass("margitaradziewicz4","images/avg_margitaradziewicz4.jpg");
</script>
BTW, such a jewelery is made by friend of mine. If You would like to have one of these for You or Your mate, visit her website (http://margitaradziewicz.blogspot.com/ )
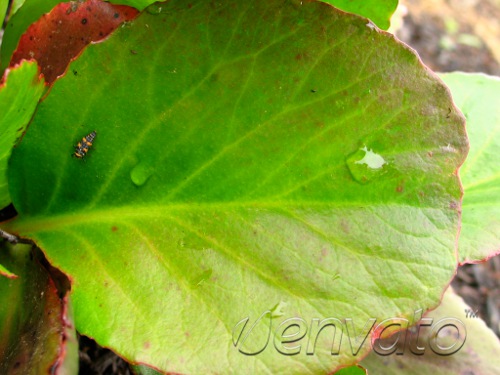
Configure MGlass3
This example shows how to use Your own CSS definitions for viewer, wrapper and picture box and how to apply it.
Show code
<img id="scottwills_leafbug" src="images/min_scottwills_leafbug.jpg" width="500" height="375" alt="" border="0"/>
<style type="text/css">
.mglass_wrapper_leafbug {
	background-color: black;
	margin: 0px auto;
}
.mglass_picture_box_leafbug {
	opacity: 0.45;
	filter: alpha(opacity=45);
}
.mglass_viewer_leafbug {
	width: 150px;
	height: 150px;
	-moz-border-radius: 75px;
	-webkit-border-radius: 75px;
	-khtml-border-radius: 75px;
	border-radius: 75px;
}
</style>

<script type="text/javascript">
var config = {
	wrapperClassName : "mglass_wrapper mglass_wrapper_leafbug",
	pictureBoxClassName : "mglass_picture_box mglass_picture_box_leafbug",
	viewerClassName : "mglass_viewer mglass_viewer_leafbug"
};
new MGlass("scottwills_leafbug","images/scottwills_leafbug.jpg", config);
</script>
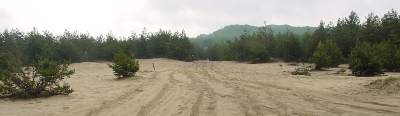
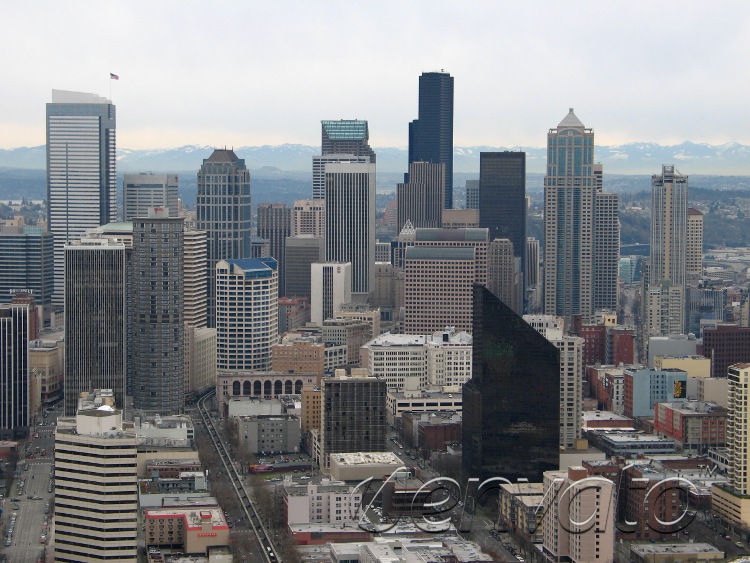
Various viewer style4
This example shows how to use different CSS definitions for viewer, wrapper and picture box for every image.
Show code
<img id="desert" src="images/min_desert.jpg" width="400" height="116" alt="" border="0"/>
<img id="cityscape2" src="images/min_scottwills_cityscape2.jpg" width="750" height="563" alt="" border="0"/>

<style type="text/css">
.mglass_wrapper_desert {
	margin: 0px auto;
}
.mglass_viewer_desert {
	width: 200px;
	height: 200px;
	-moz-border-radius: 100px;
	-webkit-border-radius: 100px;
	-khtml-border-radius: 100px;
	border-radius: 100px;
}
.mglass_wrapper_city {
	margin: 0px auto;
}
.mglass_viewer_city {
	width: 300px;
	height: 300px;
	border: 1px solid white;
}
</style>

<script type="text/javascript">
var config1 = {
	wrapperClassName : "mglass_wrapper mglass_wrapper_desert",
	viewerClassName : "mglass_viewer mglass_viewer_desert"
};
new MGlass("desert","images/desert.jpg", config1);

var config2 = {
	wrapperClassName : "mglass_wrapper mglass_wrapper_city",
	viewerClassName : "mglass_viewer mglass_viewer_city"
};
new MGlass("cityscape2","images/scottwills_cityscape2.jpg", config2);
</script>
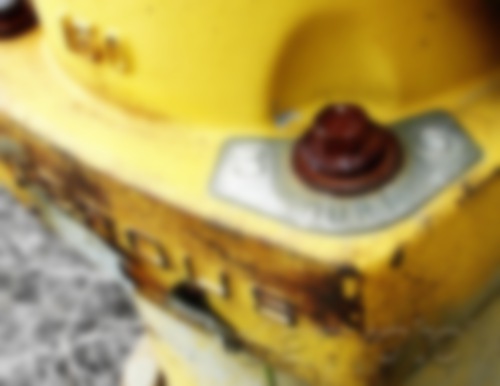
Your own HTML inside viewer5
This example shows how to insert Your own HTML code inside viewer.
By applying some filters to one of Your image (small or large) using image editor program (like PS or Gimp) You can boost the final effect.
Show code
<img id="scottwills_hydrant1" src="images/blur_scottwills_hydrant1.jpg" width="500" height="386" alt="" border="0"/>
<style type="text/css">
.mglass_wrapper_hydrant {
	margin: 0px auto;
}
.mglass_viewer_hydrant {
	width: 150px;
	height: 150px;
	-moz-border-radius: 75px;
	-webkit-border-radius: 75px;
	-khtml-border-radius: 75px;
	border-radius: 75px;
}
.mglass_inner_html {
	width: 100px;
	height: 25px;
	margin: 62px auto;
	line-height: 25px;
	text-align: center;
	color: white;
	font-weight: bold;
	background-color: #343434;
	opacity: 0.75;
}
</style>

<script type="text/javascript">
var config = {
	wrapperClassName : "mglass_wrapper mglass_wrapper_hydrant",
	viewerClassName : "mglass_viewer mglass_viewer_hydrant",
	innerHTML : '<div class="mglass_inner_html">Unblur</div>'
};
new MGlass("scottwills_hydrant1","images/scottwills_hydrant1.jpg", config);

</script>
Summary6
Once again, the integration process, with full options.
1. Import JavaScript and CSS definitions into Your website code.
<script type="text/javascript" src="mglass.js"></script>
<link rel="stylesheet" type="text/css" href="mglass.css"/>
2. Define small image tag. Remeber to give an uniqe ID for every image that You would like to be handled by mglass.
<img id="my_image" src="images/small_image.jpg" width="400" height="116" alt="" border="0"/>
3. Redefine CSS for mglass_wrapper, mglass_viewer and/or mglass_picturebox classes if it's needed or define new CSS classes.
4. Add JavaScript code. Variable "config" defined below contains complete list of handled properies. Note, that there is no need to pass the "config" argument at all.
<script type="text/javascript">
var config = {
	wrapperClassName : "mglass_wrapper mglass_wrapper_my",
	pictureBoxClassName : "mglass_picture_box mglass_picture_box_my",
	viewerClassName : "mglass_viewer mglass_viewer_my",
	innerHTML : 'This is my own HTML code'
};
var mg = new mglass("my_image", "images/large_image.jpg", config);
</script>
Note
When mglass class constructor is called, Your image definition:
<img id="my_image" src="images/small_image.jpg" width="400" height="116" alt="" border="0"/>
bacame surrounded by additional code:
<div class="mglass_wrapper mglass_wrapper_my" style="width: 400px; height: 116px;">
	<div class="mglass_viewer mglass_viewer_my" style="background-image: url("images/large_image.jpg"); visibility: hidden;"></div>
	<div class="mglass_picture_box mglass_picture_box_my" style="width: 400px; height: 116px;">
		<img id="my_image" src="images/small_image.jpg" width="400" height="116" border="0" alt="">
	</div>
</div>
So, knowledge of this could be usefull when it's needed to change wrapper, viewer or picture box CSS definitions.
Magnifying Glasspsalaciak 2010
If You have any question or need some help with integration, feel free to contact me. I'll do my best to assist You.
Piotr Sałaciak