Survey Builder Pro Android app with Powerful Drag & Drop Survey Generator backend.
Survey Builder Pro - Build your Survey form in 15 minutes .
Created on : 18-June-2018
By: The Code Factory
Email: rupen@techintegrity.in
Skype : rupenm (Bangalore)
What's App : +91-8866045386
Cell : +91-8780784484
We at TheCodeFactory ( A Product division of Tech Integrity Services ) believes in delivering benchmarking cutting edge solution’s which are scalable with large audience and easy to understand and can save 1000's of your devlopers hour's.
Table of Contents
- Overview
- Complete Data Flow Diagram
- Database design's
- Features
- How to set up and configure server side
- How to setup and Configure Android Code
A) Overview - top
A Complete Survery Builder Pro with drag and drop robust components along with Android Application for users to submit theiry survey which is coded with Native Android and is for sale with 100% source code. With this you can build any kind of complicated survey's.
- With this app you can make any complicated survey's in 15 Minutes by just draging and droppping Controls from the panel.
- Single domain license - This includes full source code for Backend Survey Builder using PHP ( Latest Code Ignitor Framework ) along with & API and native Android code for user's to submit the survey's.
- Pure Native Code implementation.
- Support unlimited survey's.
- Support Access controls for survey's.
- Powerful Android App for users to submit their survey's.
- Survey's results exported on CSV/ Excel.
- Easy Editing Email format using WSYWIG Editors.
There are lots of sample survey's created which can get you the idea of how to create your survey's.
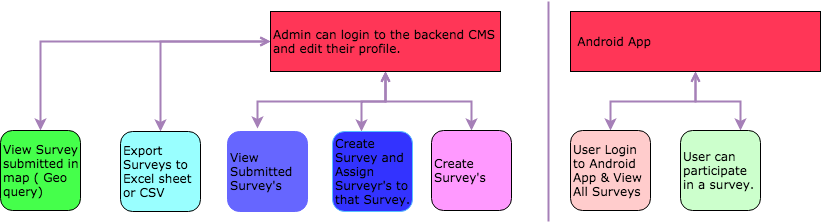
B) Complete Data Flow Diagram - top
Picture speak's better then text :)
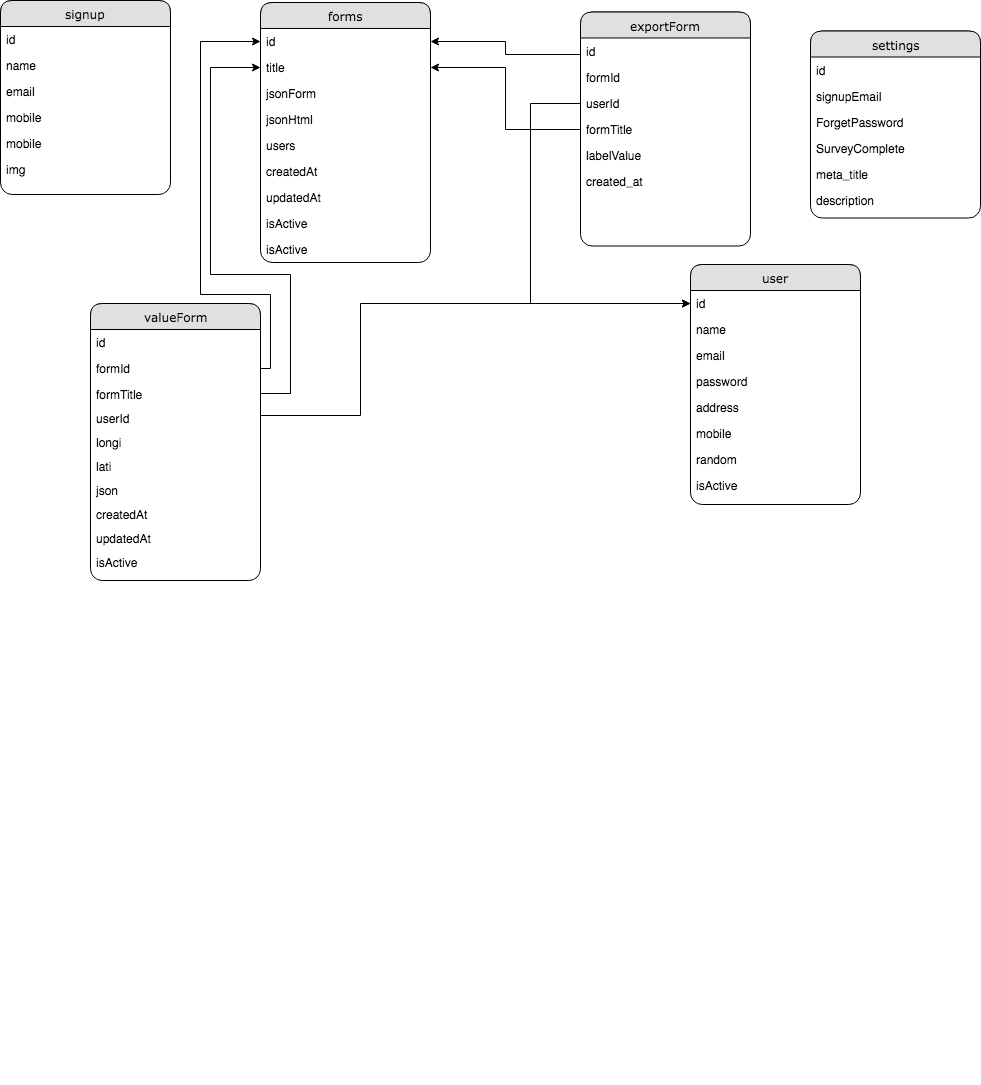
C) Database Design's - top
Entire Database design with primary and foreign key representation.
D) Features - top
Below are some of the great features of the app.Features included in Android App
- Implement with Native Java using Android Studio with Material Design and Mordern coding Techniques.
- Stylish interface, cool animation between views and awesome transition to match top notch international quality.
- Surveyer's can login to the app and can View all survey's .
- Participate in single or multiple survey's.
- Edit any survey's.
- Stylish Angular 2.0 & Bootstrap Based CMS , Support & easy to install latest Php 7.0. Coded with codeignitor MVC framework.
- A Very Unique Dashboard to show Number of Surveryer's,Number of survey's in the system .
- Support N-Number of survey's
- Stylish Drag and Drop interface to create any kind of survey's. Even the complex survey forms can be build in 15~30 Min.
- Views Surveys done on map Cluster by Location's ( Goe Survey's )
E) How to set up and configure server side . - top
A Brief about the CMS & API Code-
Some of the pointers worth knowing :
- We have used Codeigniter Php framework for Backend and we have used MYSQL Database (https://codeigniter.com/) .
- We have used latest Php 7.0 Version which is stable and fast when it comes to performance .
- Also we personally suggest to host this app on cloud server.
- There are lots of great player out in market like vultr.com , linode.com , digitalocean.com , amazon ec2 .
- A good Cloud with at-least 1 GB Ram is a good plan to start with , you can always keep track of your CPU Usage and upgrade your plan accordingly.
- There are many player like microsoft azure who has pay as you go model and they can give you uptime and faster response .
- To the best of our knowledge we have attempted to give the best architecture to this app by using MVC model to Web and API , Making Modern Material CMS , Designing the Database structure in such a way that it can fit to any business requirement , this app will be a perfect fit right for small scale business to any large scale business.
- Moreover this comes with full fledge sample data entry for you to easily understand how you can enter data to fit any product.
-
Pre-requesties to set up server side code:
- We need LAMP set up. LAMP stands for Linux Apache MYSQL and PHP 7.0 .
- We recommend this tutorial for installing LAMP set up on your ubuntu cloud server (https://www.digitalocean.com/community/tutorials/how-to-install-linux-apache-mysql-php-lamp-stack-on-ubuntu-16-04 ) .
- Once installation is done go to FTP and open /var/www/html and inside this you can upload the content of "Web-Server-Code-Final" folder. This is just to get proper hang of product.
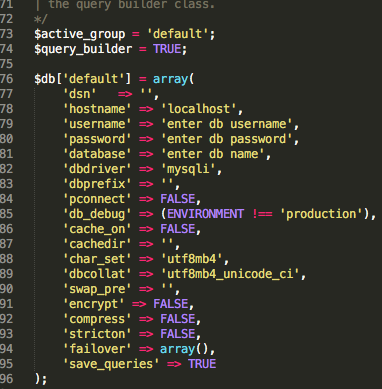
- Now open application->config->database.php and change your database user name , database password , name of database.
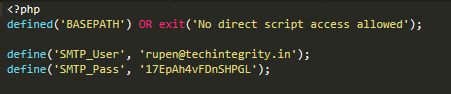
- Now open mail.php and change the SMTP Credential which in this case is sendinblue. You can create free bluehost account by loged into https://www.sendinblue.com/
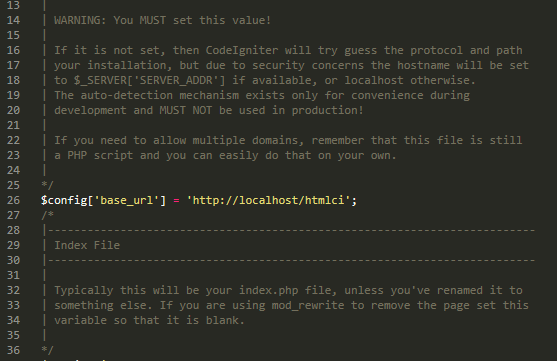
- Now open config.php and change the below variable. <
- On top of this you have to change "title" by logged in to CMS -> Settings -> change Meta title & Meta Description.
-
Below is the .htaccess file you shoud use - Enable mode-rewite to on and copy and paste the below file into .htaccess and add to to root of your project.
RewriteEngine On
RewriteBase /
RewriteCond $1 !^(index\.php|resources|robots\.txt)
RewriteCond %{REQUEST_FILENAME} !-f
RewriteCond %{REQUEST_FILENAME} !-d
RewriteRule ^(.*)$ index.php?/$1 [L,QSA]
# If we don't have mod_rewrite installed, all 404's
# can be sent to index.php, and everything works as normal.
# Submitted by: ElliotHaughin
ErrorDocument 404 /index.php
username : admin
password : admin
F) How to setup and Configure Android project - Native Java Code . - top
A Brief about the Android Code-
Some of the pointers worth knowing :
- We have use below gradle's in the project
- implementation 'com.squareup.retrofit2:retrofit:2.3.0'
- implementation 'com.squareup.okhttp3:logging-interceptor:3.4.1'
- implementation 'com.squareup.okhttp3:okhttp:3.4.1'
- implementation 'com.squareup.retrofit2:converter-gson:2.1.0'
- implementation 'com.android.support:multidex:1.0.1'
- implementation 'com.nineoldandroids:library:2.4.0'
- implementation 'com.squareup.picasso:picasso:2.5.2'
- implementation 'org.sufficientlysecure:html-textview:3.5'
- implementation 'com.facebook.android:facebook-android-sdk:[4,5)'
- implementation 'com.loopeer.library:itemtouchhelperextension:1.0.5'
- implementation 'com.crystal:crystalrangeseekbar:1.1.3'
- implementation 'com.jakewharton:butterknife:8.5.1'
- annotationProcessor 'com.jakewharton:butterknife-compiler:8.5.1'
- Import the project in Android studio Version 3.0.1 and run the project. ( Check below screen shot.)
- A Brief about folder structure .
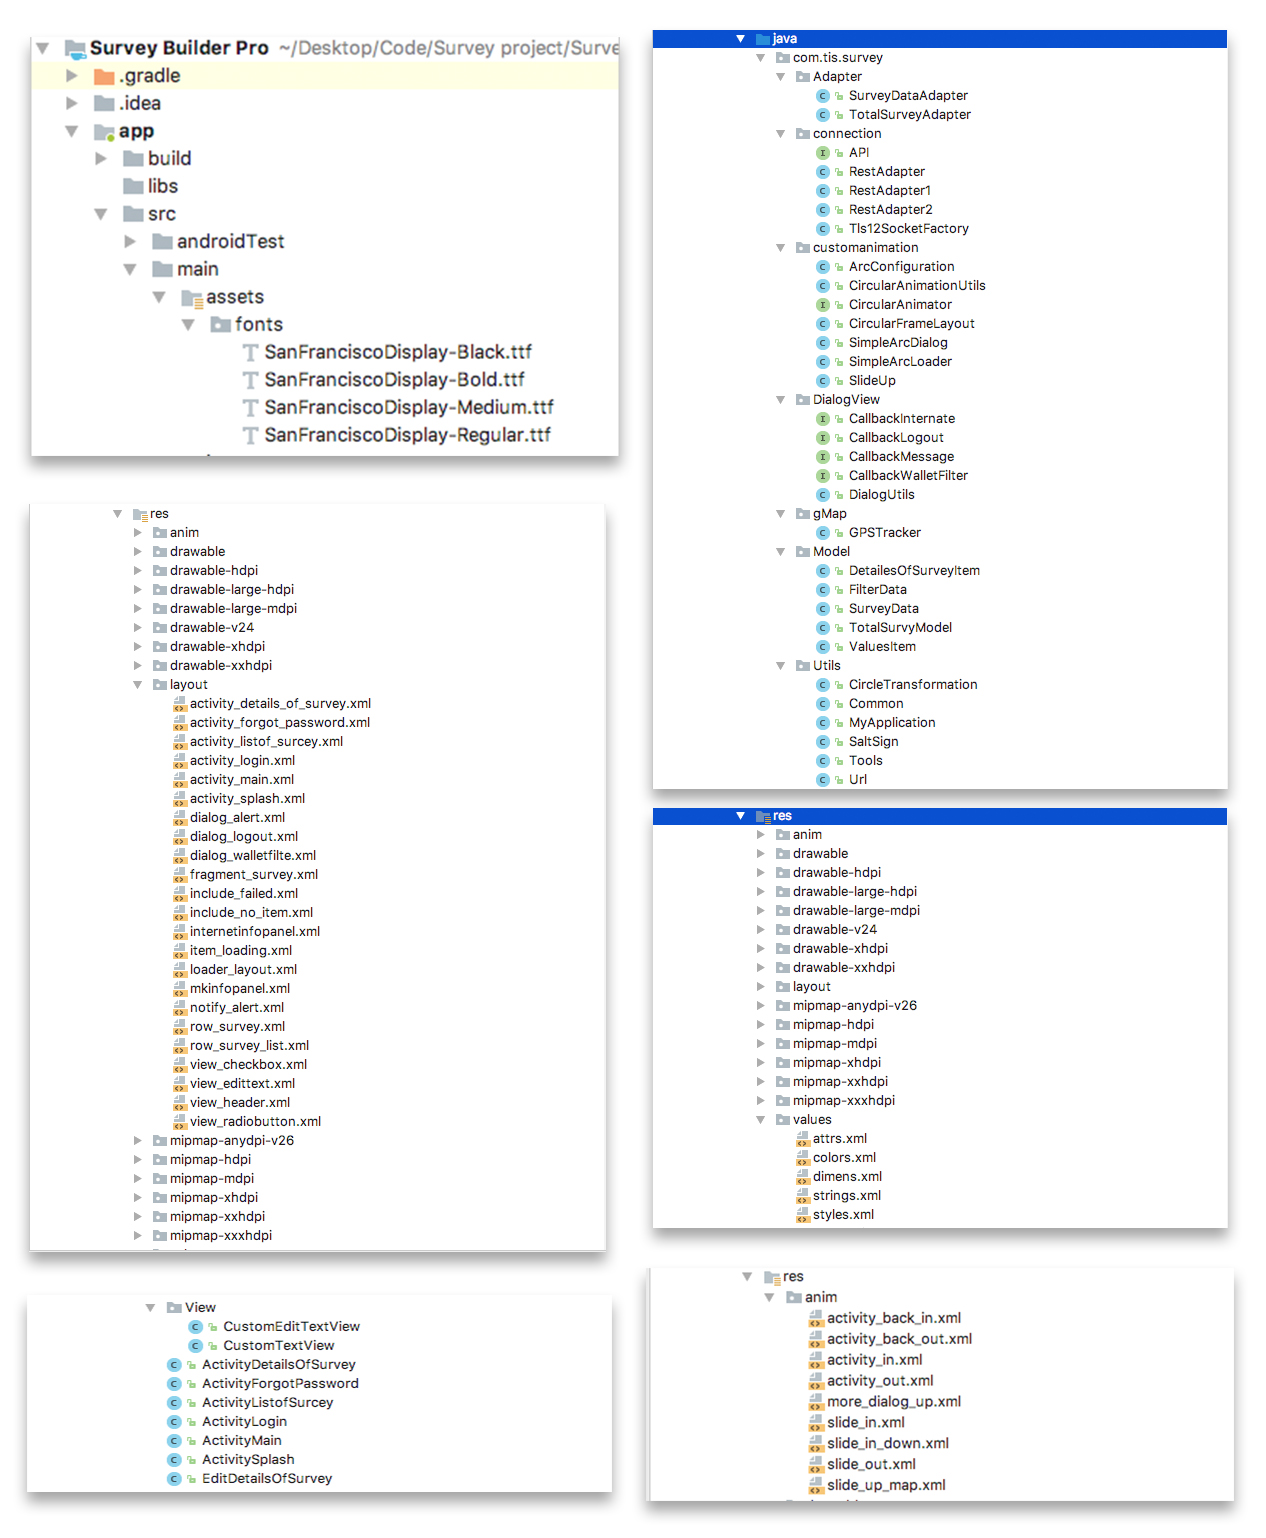
- Looking at the below screenshot the quality of the code is clean and its been managed in modules , each folder represent the module . Name of each module is named under their folder which is user friendly and gives a clear understanding about the code . Name of the folder is keep self explationary and give you clear idea about the code .
- We have used Custom fonts and all fonts are placed inside Font folder.
- In order to make the build size smaller we have made a very nominal use of images and all images are kept under "Resources/Drawable" folder .
- To reskin the app for Playstore :
- You need to change the icon which is inside "Resources/minmap" folder.
- Change the graphics which are in "Resources/Drawable" folder.
- Change the XML Layout which are in "Resources/Layout" folder. ( In case if you want to change the layout's)
- In the above step we have walk you through how to install server side code , So assuming you have install server side code on your cloud or dedicated server . All you need to do is open "Utils" folder -> Open url.java File -> and change the below function
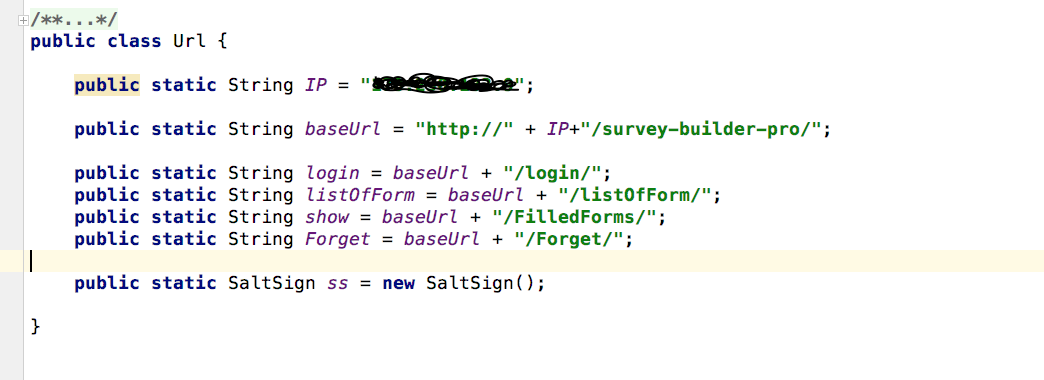
- Just repalce ip address with the ip-address or domain name of your server.

Thats it :) Clean the Build and run the app and it will be all ready to rock .
Once again, thank you so much for purchasing this theme. As I said at the beginning, I'd be glad to help you if you have any questions relating to this theme. No guarantees, but I'll do my best to assist.
Rupen Makhecha