Introduction
Thank you for purchasing our plug-in. If you have any questions that are beyond the scope of this documentation, please feel free to contact us.
About Item
Popover Builder Responsive WordPress Plugin is a premium multi-purpose popover for different tasks such as to show text, images, import content from other pages etc. It comes with 50+ built-in popover designs, and it has lot of options to customize the appearance and behaviour of popovers. The plugin is responsive and mobile friendly.
Builder And Editor
It also contains powerful Popover-Builder and Popover-Editor to change or edit pre-built designs. And also create new ones.
Bootstrap & None-Bootstrap
You can use this plugin with "Bootstrap" And "None-Bootstrap" Sites without any issue. It also support both "Bootstrap 3.x" and "Bootstrap 4.x" versions. Bootstrap is the most popular front end framework in the world. It is 100% responsive, mobile friendly with advanced features.
Support
You can contact us through our email or item's comments dashboard any time for any query. We will try our level best to solve your issues.
Step 1 : Extracting .zip Files
Extract all files from Popover-Builder-Responsive-WordPress-Plugin.zip file that you have downloaded from CodeCanyon. You will find "PopoverBuilder.zip" file in extracting files, this is installable Plugin file.
Step 2 : Installing The PlugIn
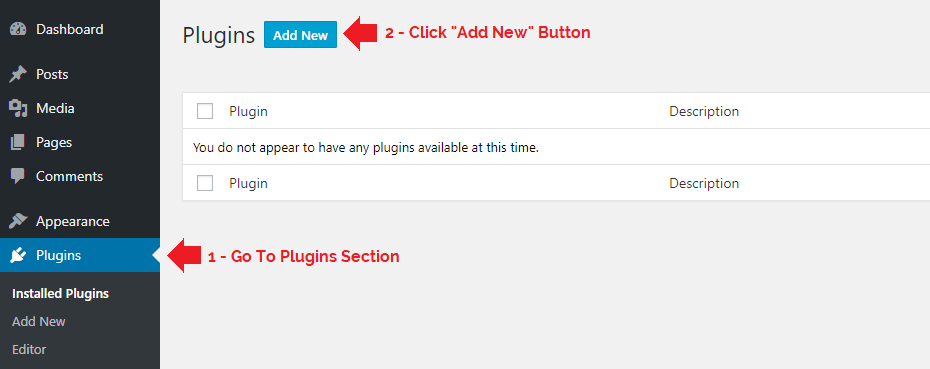
Go to your WP Plugins page and click "Add New" button.
Step 3 : PlugIn Upload Section
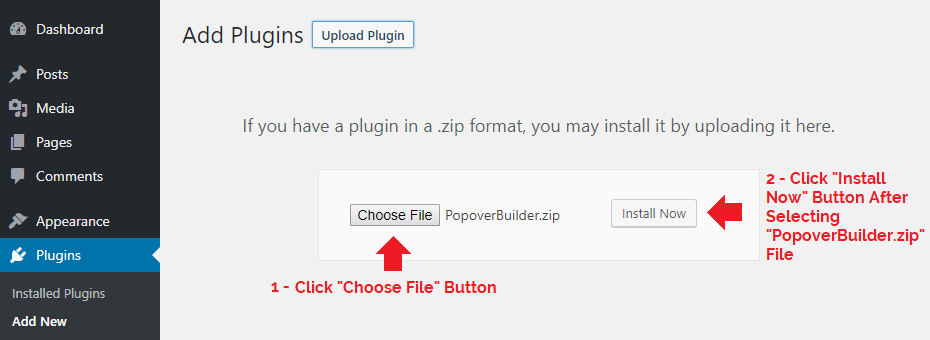
In plugin upload section click on "Upload Plugin" button.

Step 4 : Choose PlugIn File
Click on "Choose File" button, and then select the "PopoverBuilder.zip" file.
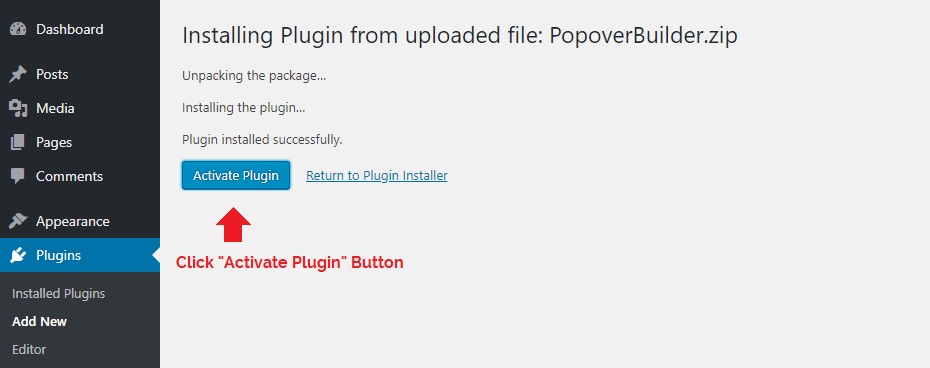
Step 5 : Activate Plugin
Click on "Activate Plugin" button after Plugin installed successfully.
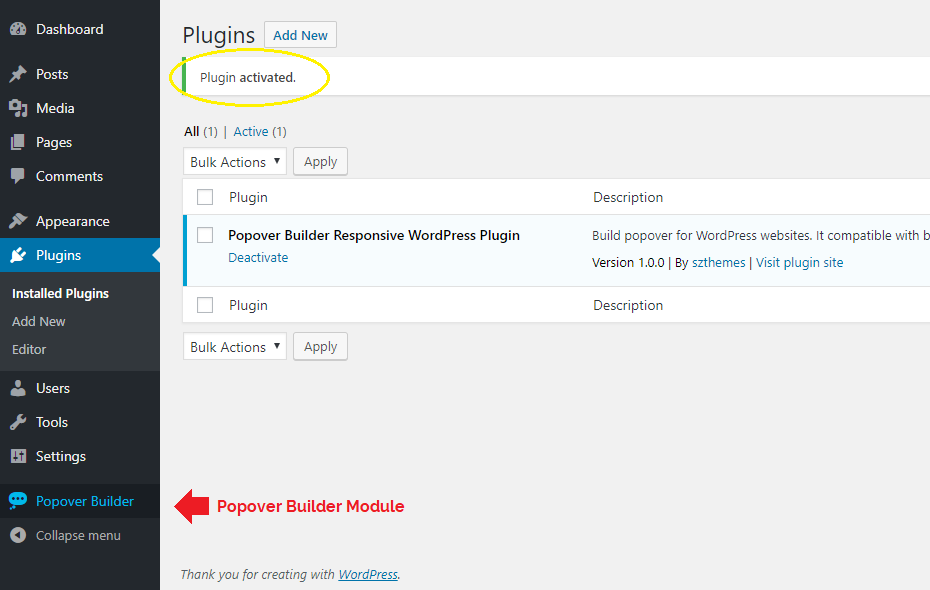
Step 6 : Popover Builder Module
After activating the plugin Popover Builder module title will appear in dashboard menu.
Step 1 : Go To Plugin Menu Page
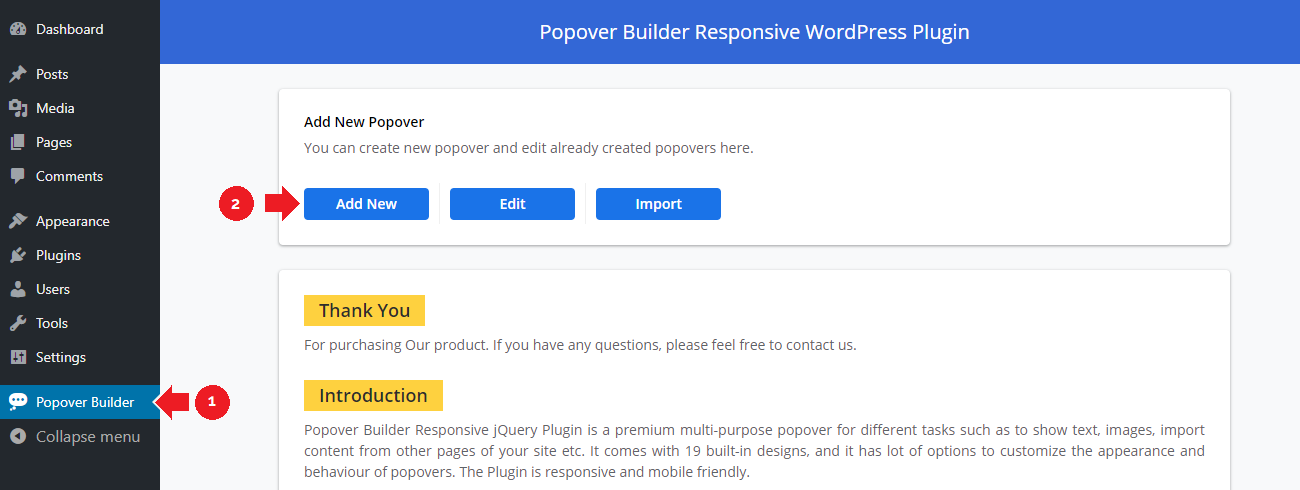
Click on "Popover Builder" menu item that is appearing in dashboard menu. This will take you the main page of the plugin and click on "Add New" Button.
Step 2 : Select Design
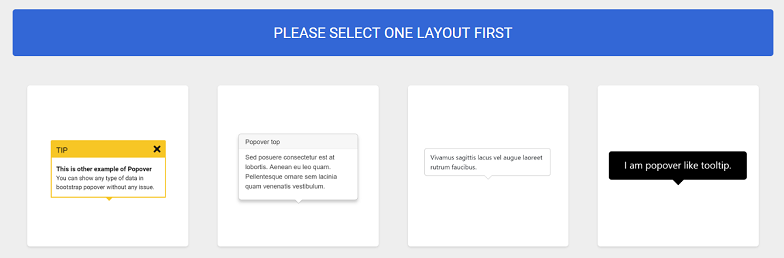
Now Select the design which ever popover you want to show on your website.
Step 3 : Assign Unique Name
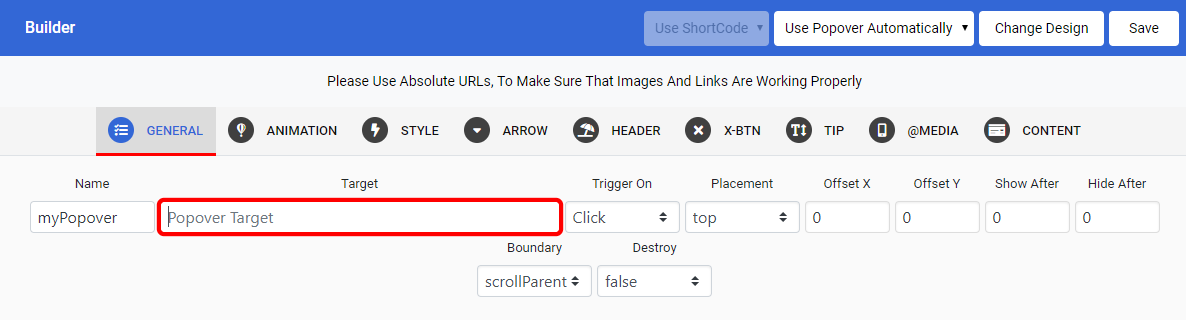
Assign unique name to selected popover.

Step 4 : Assign Target Element
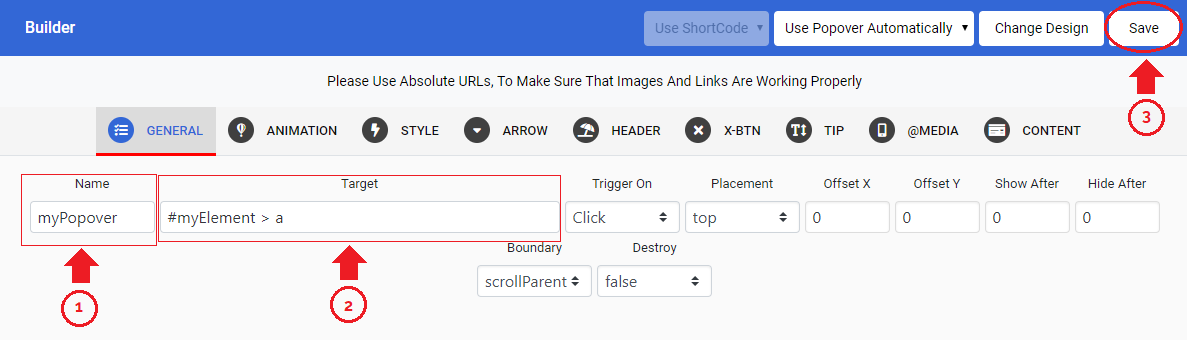
Here you will write the name, id, class or attribute of that particular element from your website on which you want to show popover. For example you write .myelement > a , The popover will show on a which is child of .myelement element.
Step 5 : Save Popover
After making changes now click on Save button to save popover.
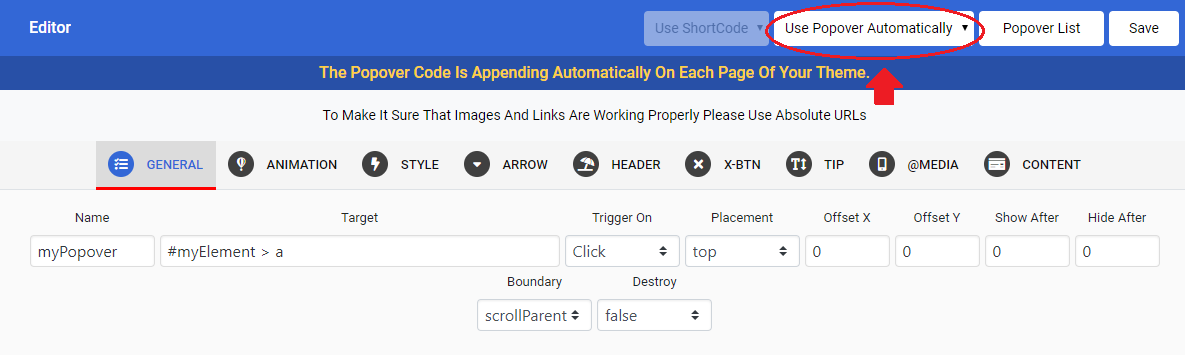
Method 1 : Automatically
If you don't want to use shortcode or function method to add popover in your site then you can add a popover by selecting "Use Popover Automatically" option. This option will add selected popover automatically and Popovers will appear on Target Elements.
Method 2 : Shortcode
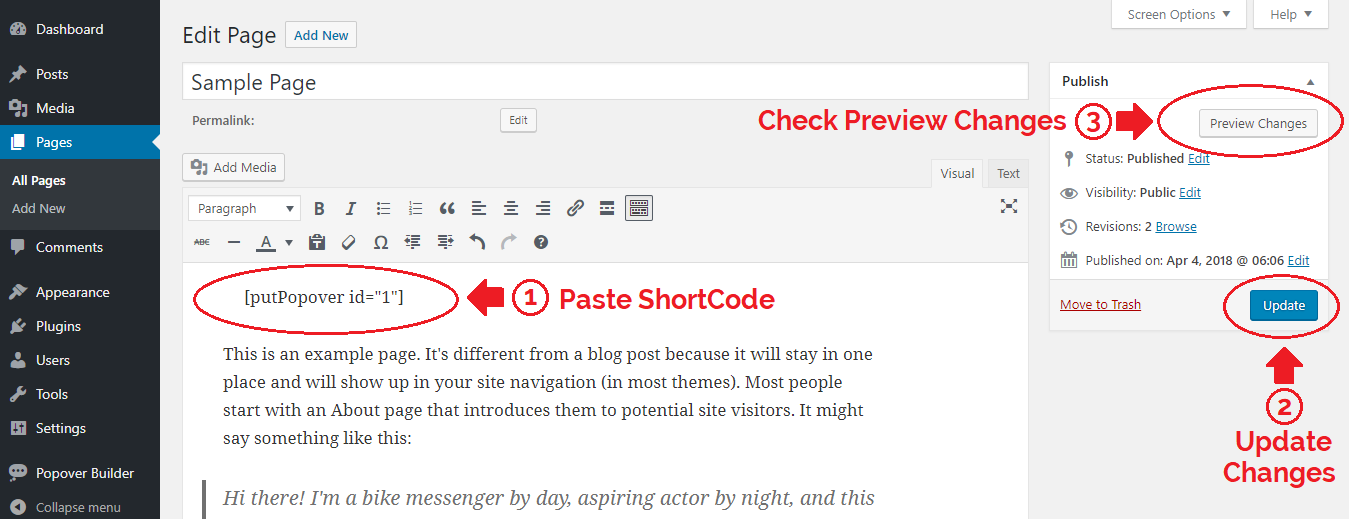
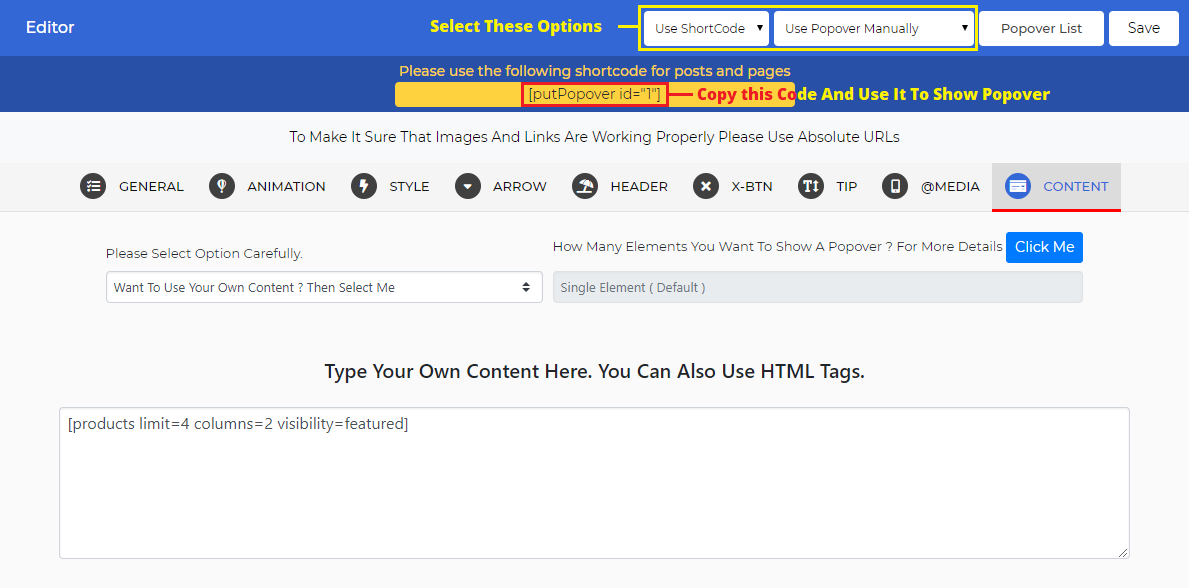
You can add a popover into your page's main content area by using "Shortcode".
1 - Select the "Use Popover Manually" option.
2 - Select the "Use ShortCode".
3 - Copy the shortcode from shortcode section that will appears just below the main menu of the builder.
4 - Click the "Save" button

5 - Paste the popver's shortcode into your page's main content area and update the page or post.
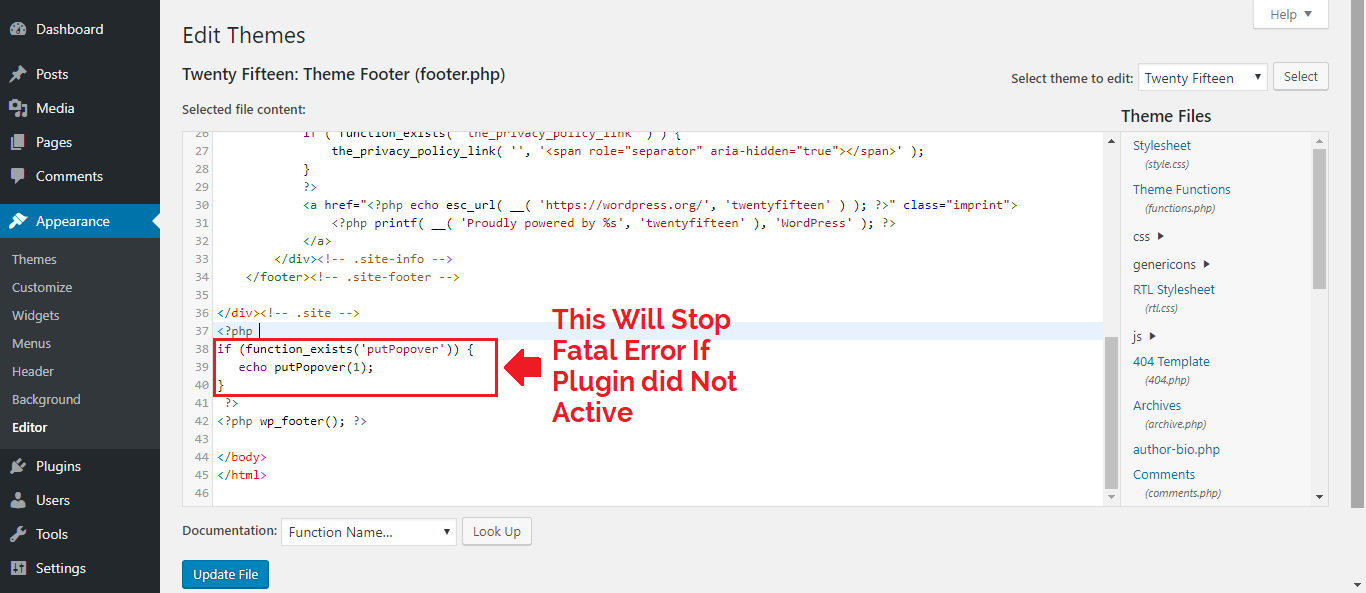
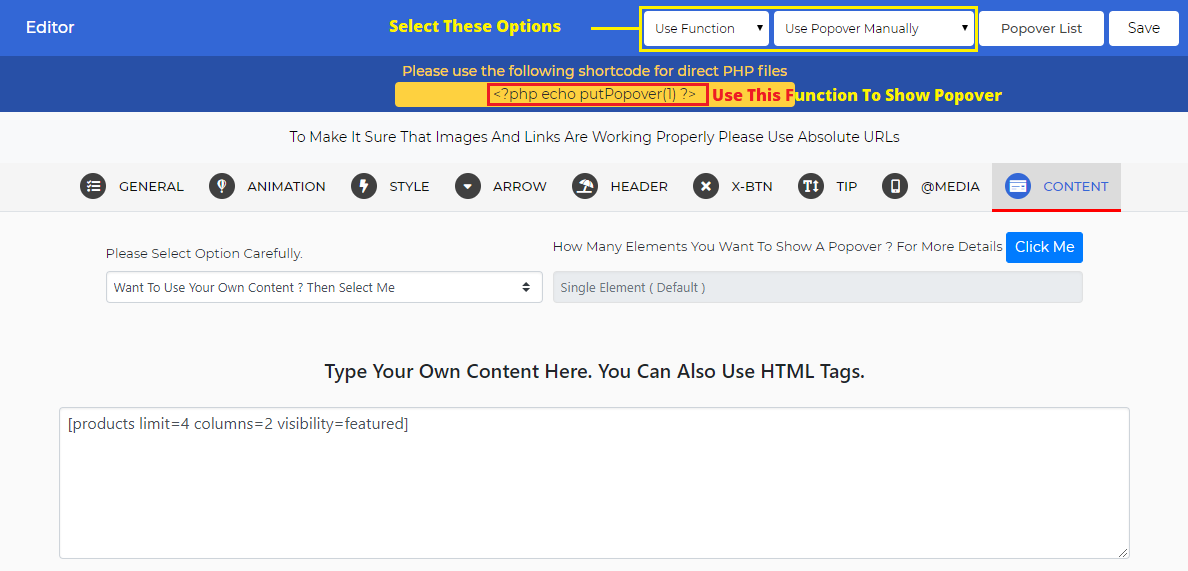
Method 3 : Function (PHP)
Note : Use this method very carefully. Because you are editing a direct theme php file.You can add the popover directly to one of your theme’s php file.
1 - Select the "Use Popover Manually" option.
2 - Select the "Use Function".
3 - Copy the function code from function code section that will appears just below the main menu of the builder.
4 - Click the "Save" button
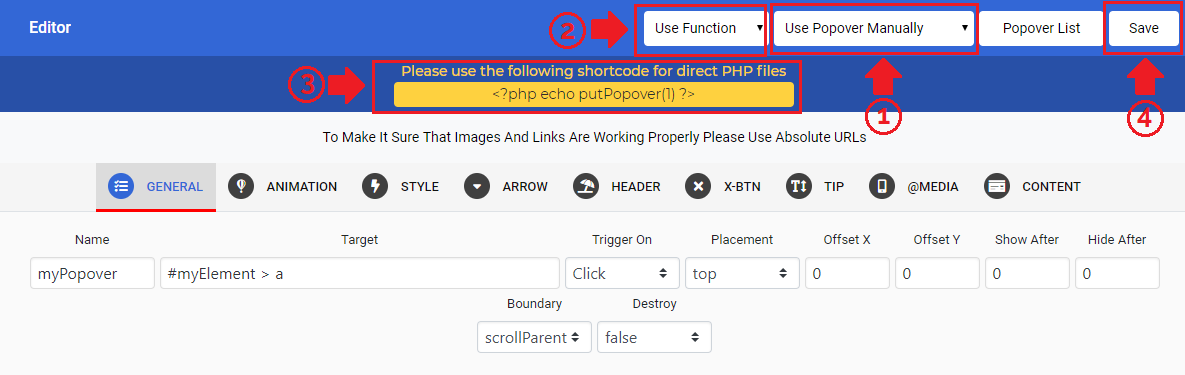
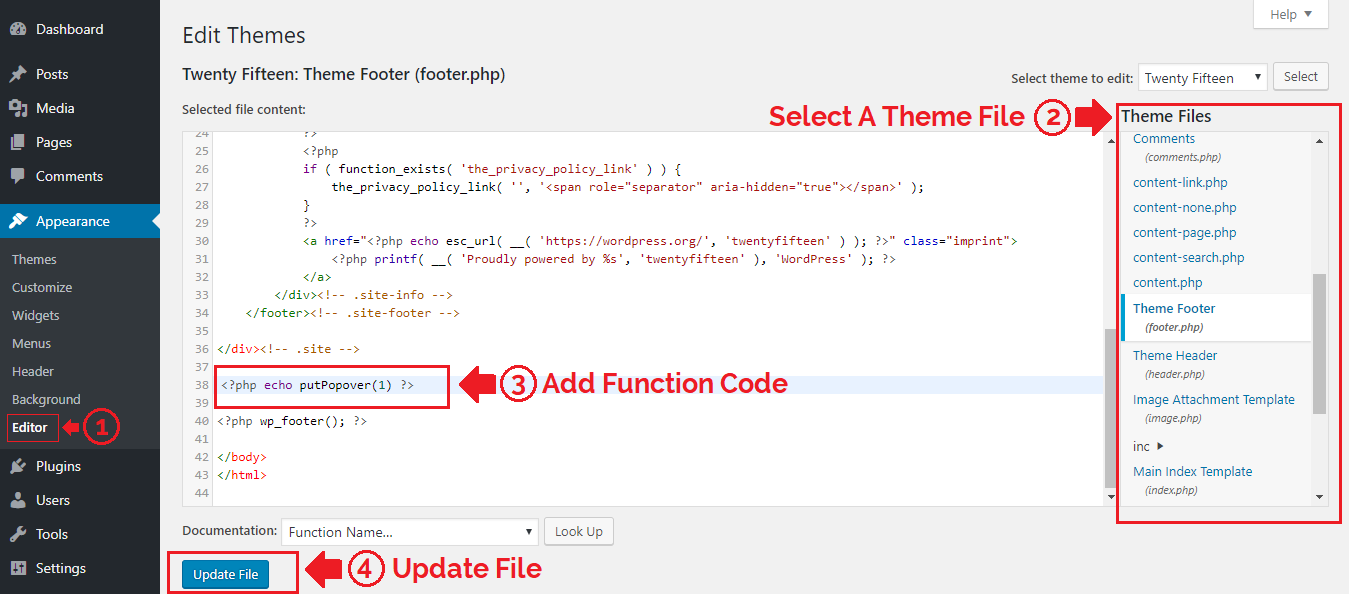
5 - Paste the popver's function code into your theme’s php file and update the file.
Using Popover In Gutenberg
You can add a popover into your page's main content area by using "Shortcode" in Gutenberg.
1 - Open Post Or Page.
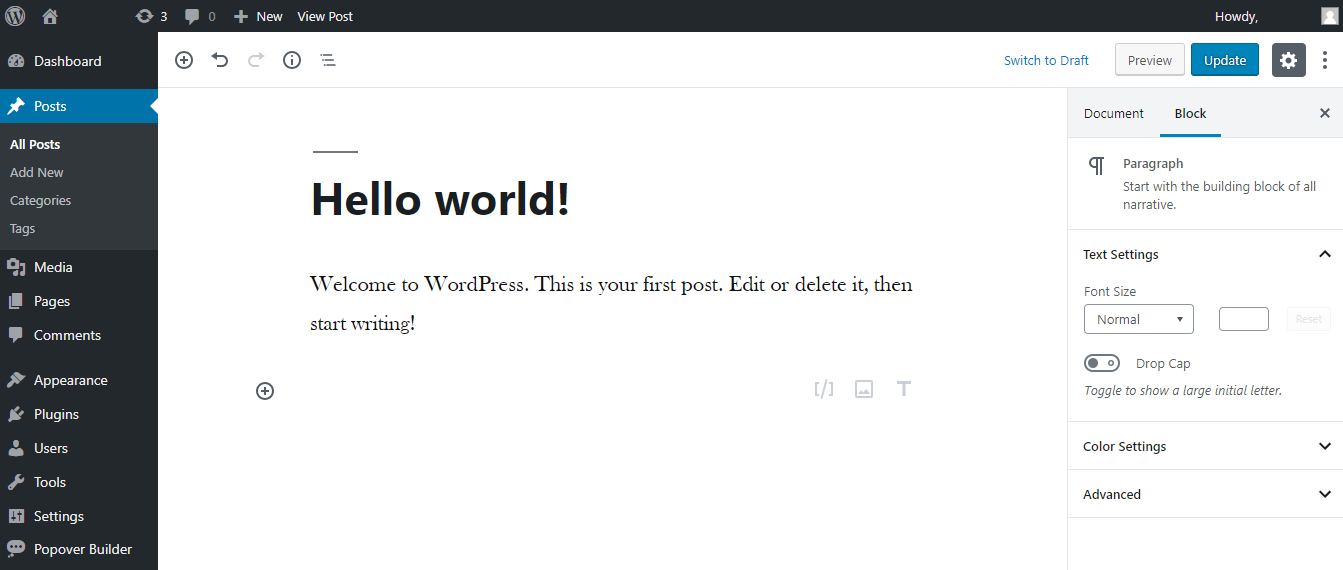
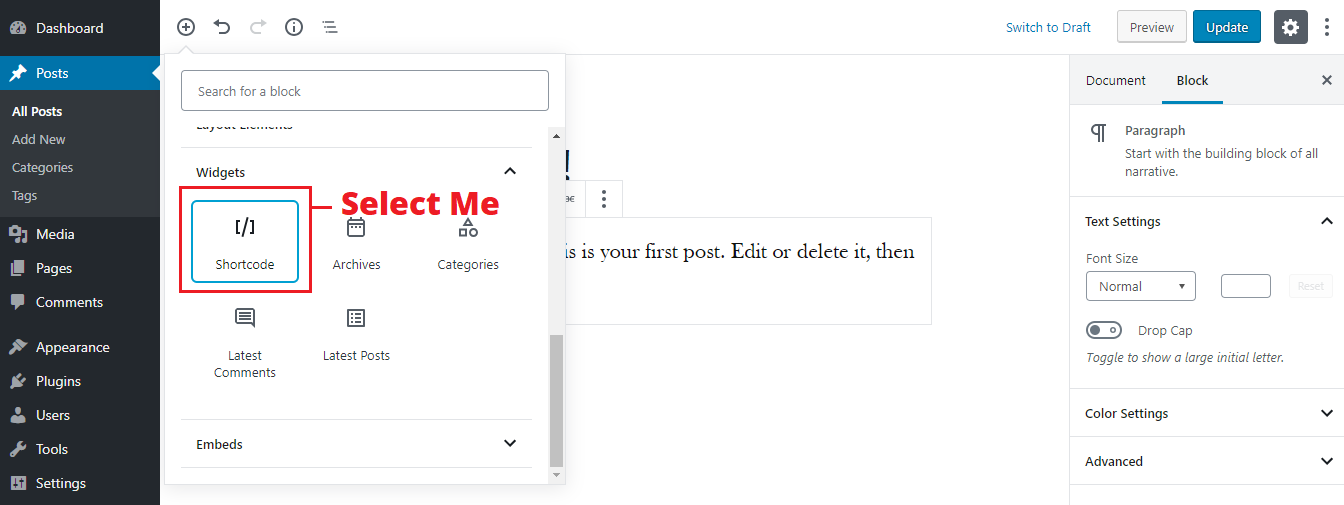
2 - Now Click On Add Block Button Icon.
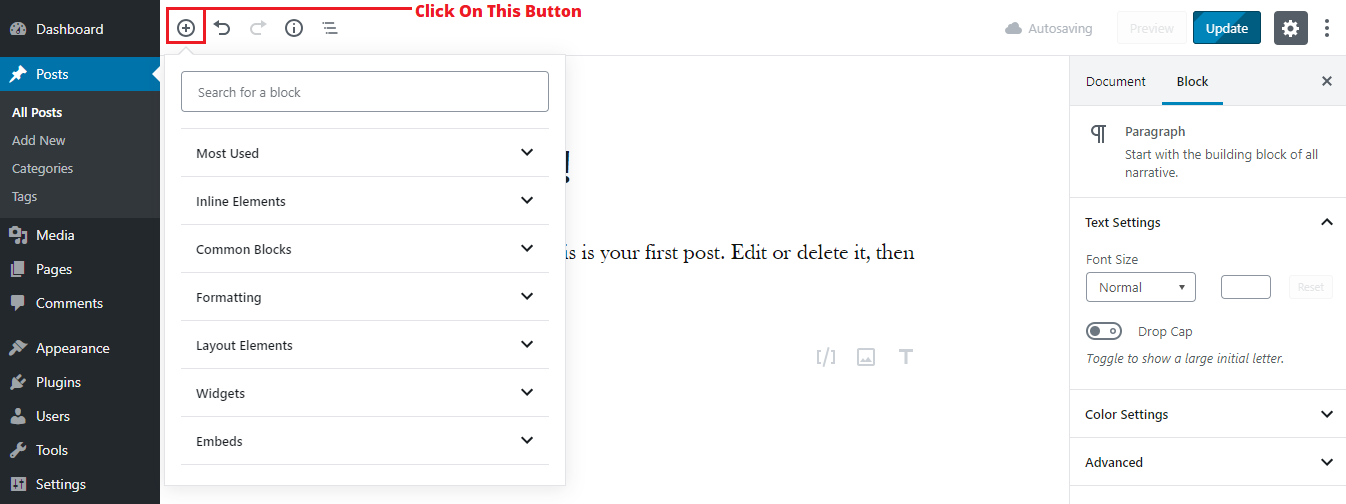
3 - Click on Widgets Dropdown
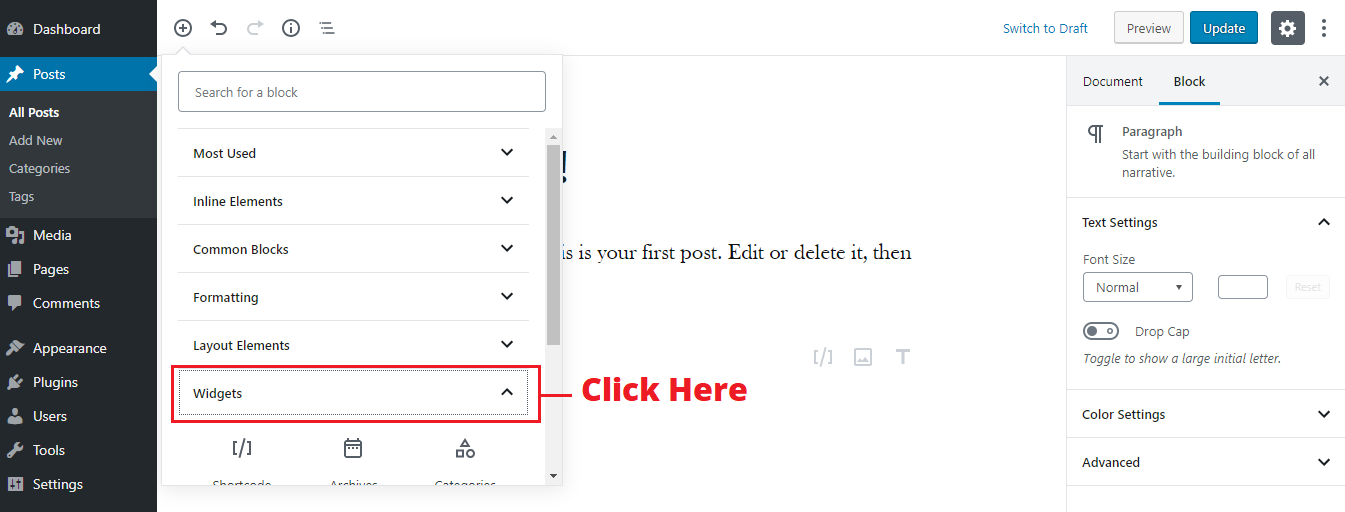
4 - Click on ShortCode Item
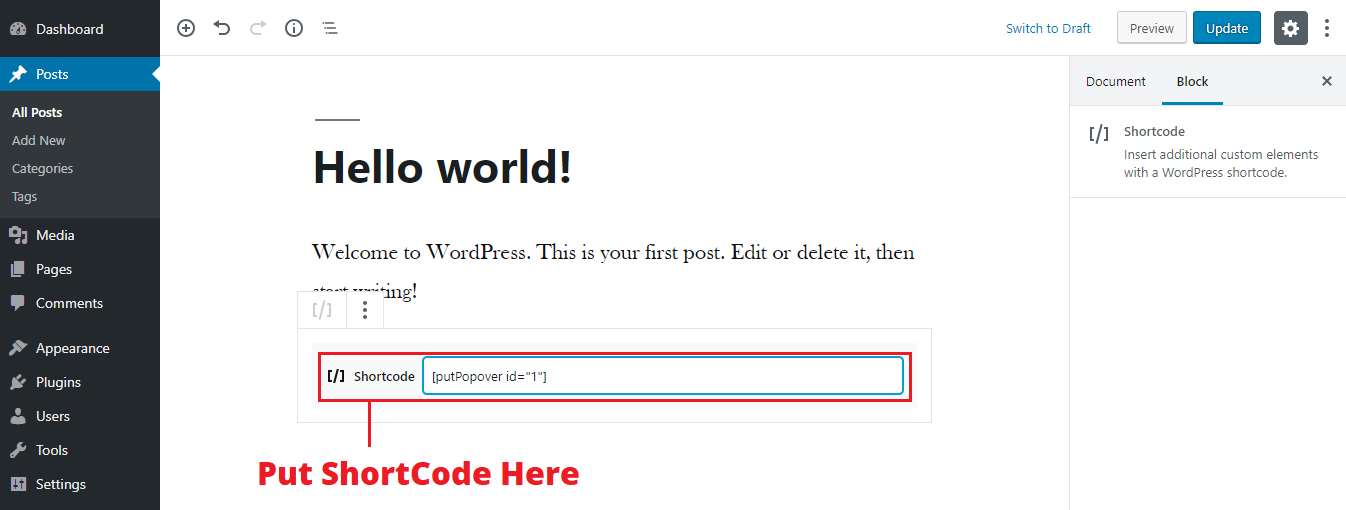
5 - Paste ShortCode Inside ShortCode Block
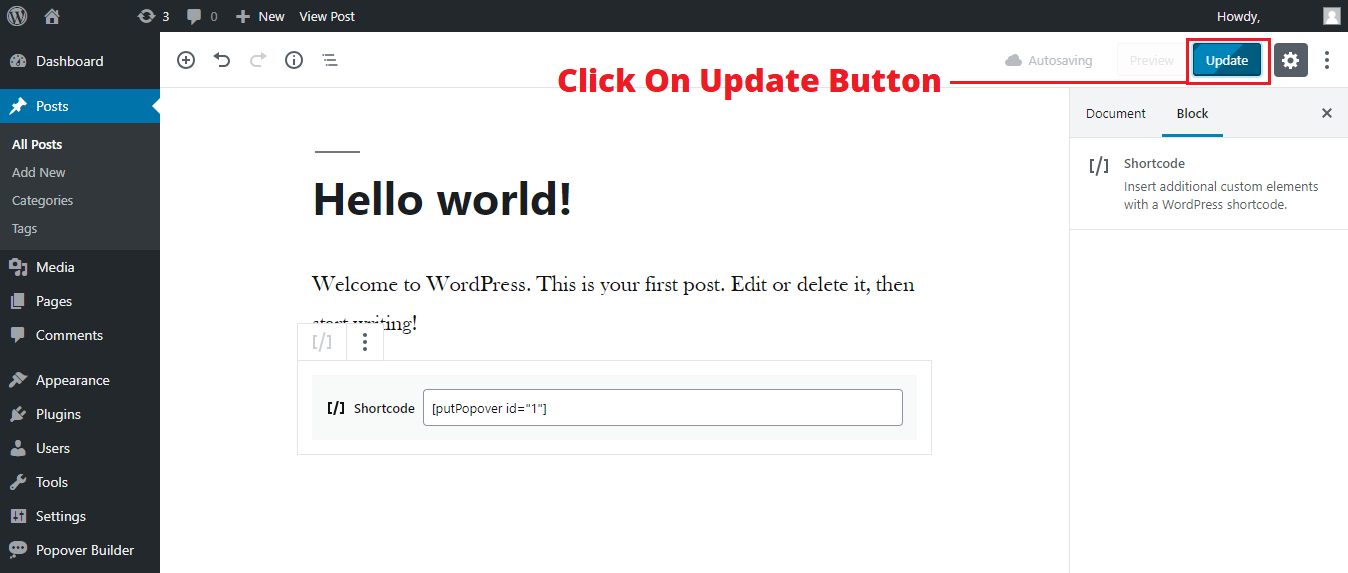
6 - Click On Update Button
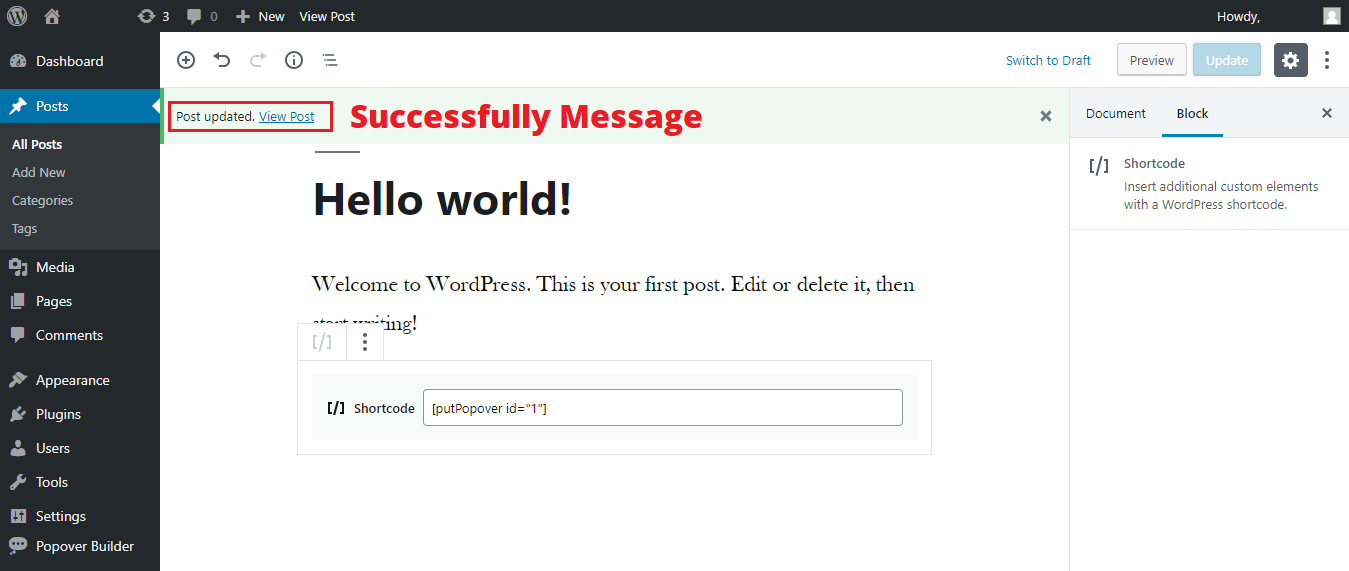
7 - Updated message Appears
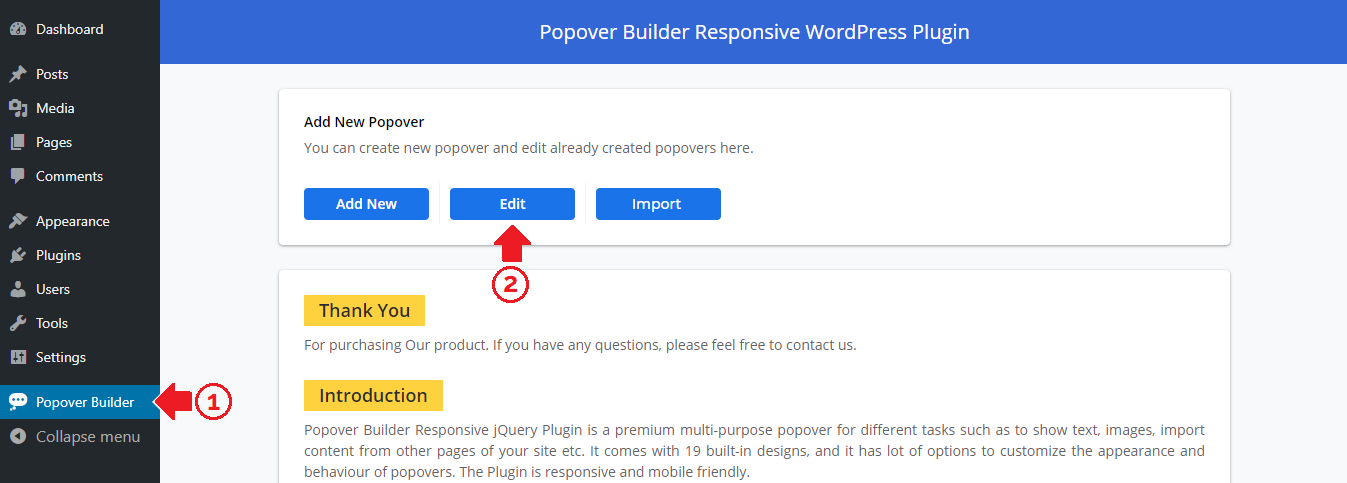
Step 1 : Open Popover List
Click on "Popover Builder" menu item that is appearing in dashboard menu. This will take you the main page of the plugin and click on "Edit" Button.
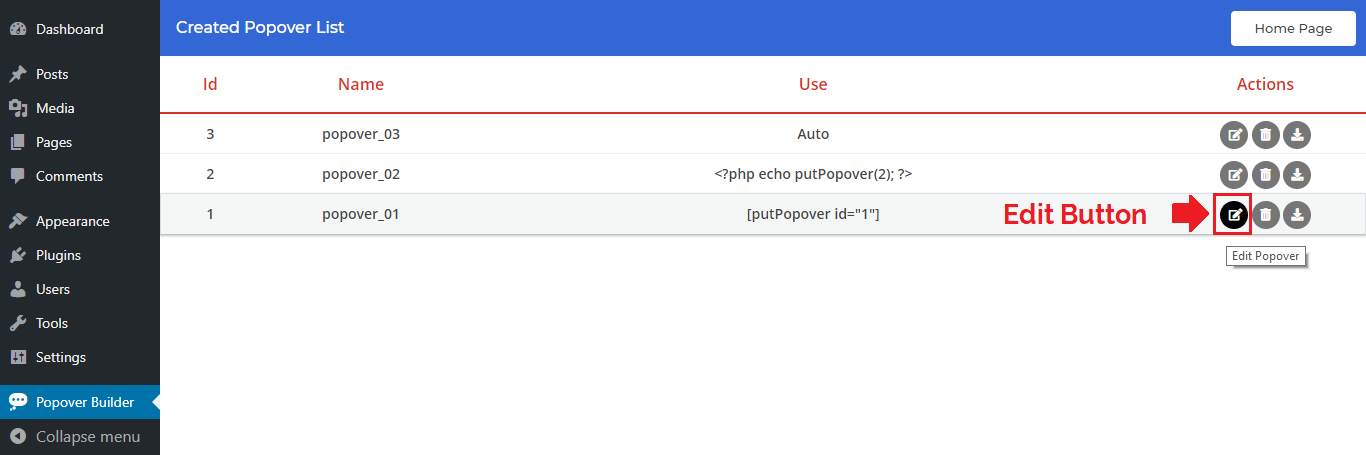
Step 2 : Edit A Popover
Now find the popover which you want to edit from list and click "Edit Icon" Button.
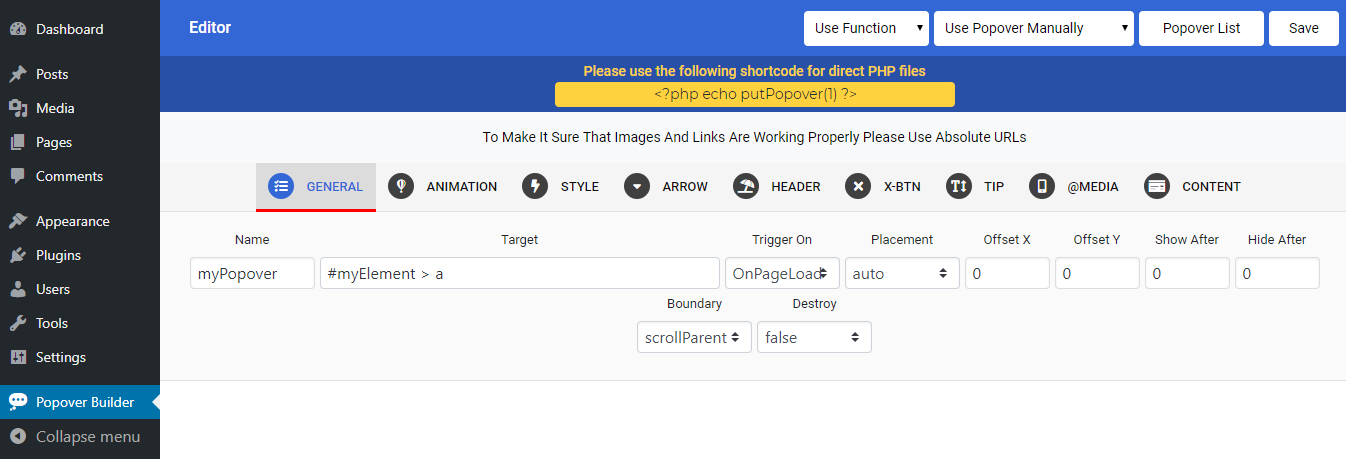
Step 3 : Editor Page
After pressing "Edit Icon" button it will take you "Editor Page". Make changes and press save button. It will update popover automatically.
Step 1 : Open Popover List
Click on "Popover Builder" menu item that is appearing in dashboard menu. This will take you the main page of the plugin and click on "Edit" Button.
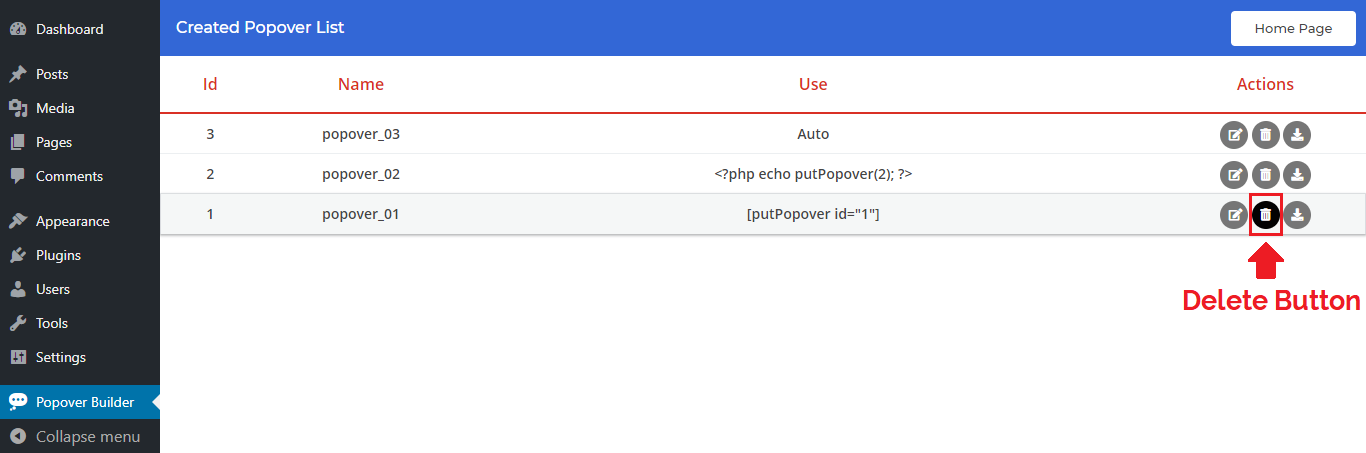
Step 2 : Remove Popover
Now find the popover which you want to remove from list and click on "Remove Icon" Button.
Step 1 : Open Popover List
Click on "Popover Builder" menu item that is appearing in dashboard menu. This will take you the main page of the plugin and click on "Edit" Button.
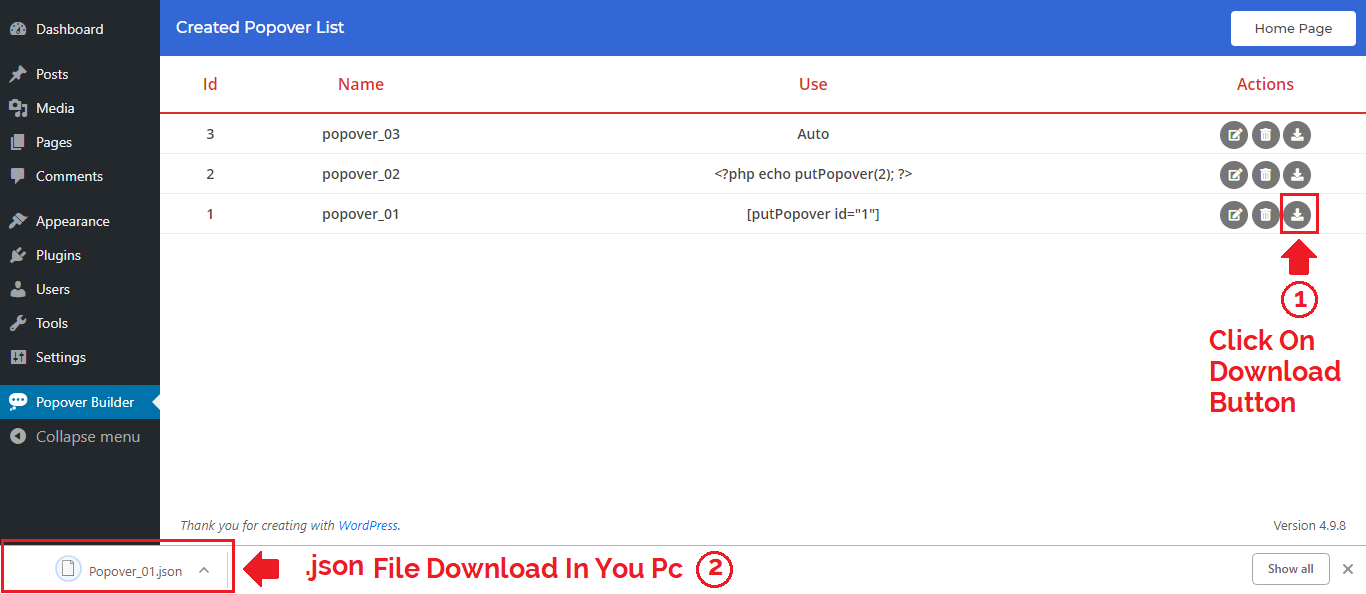
Step 2 : Export Popover
Now find the popover which you want to export from list and click on "Export Icon" Button.

Step 3 : Exported Popover Files
After click on "Export Icon" button it will export or download popover data in a json file.
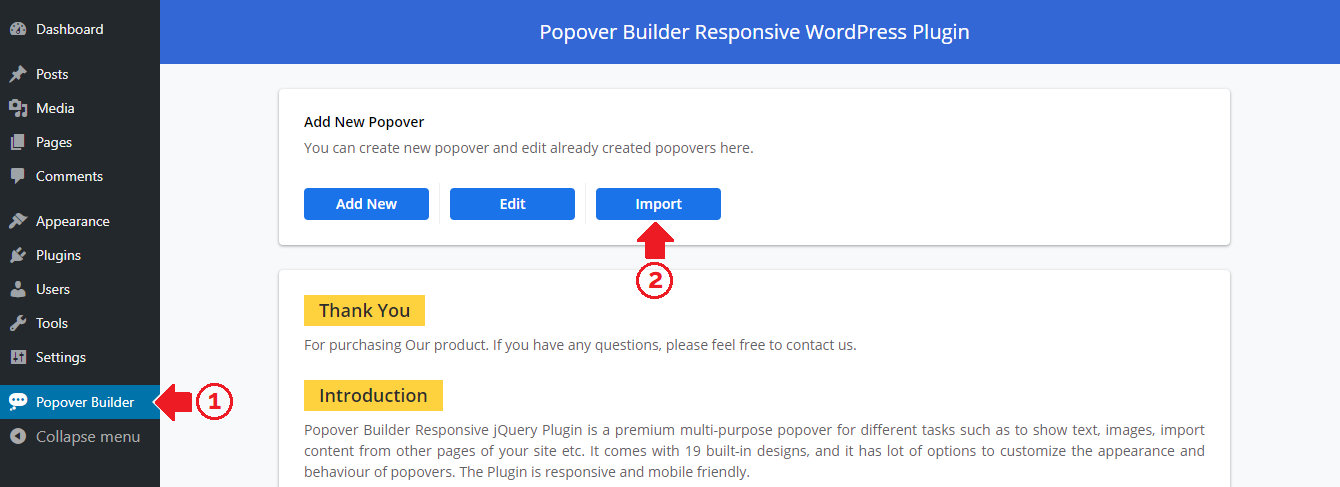
Step 1 : Open Imported Popover List
Click on "Popover Builder" menu item that is appearing in dashboard menu. This will take you the main page of the plugin and click on "Import" Button.
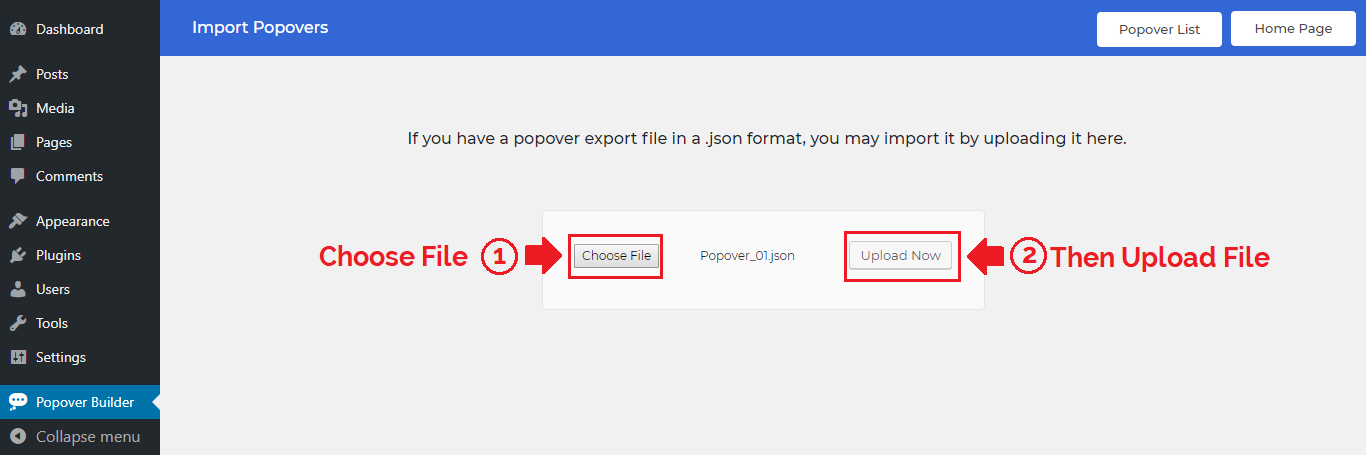
Step 2 : Import Popover
Select the popover import .json from your computer and click on "Upload Now" Button.
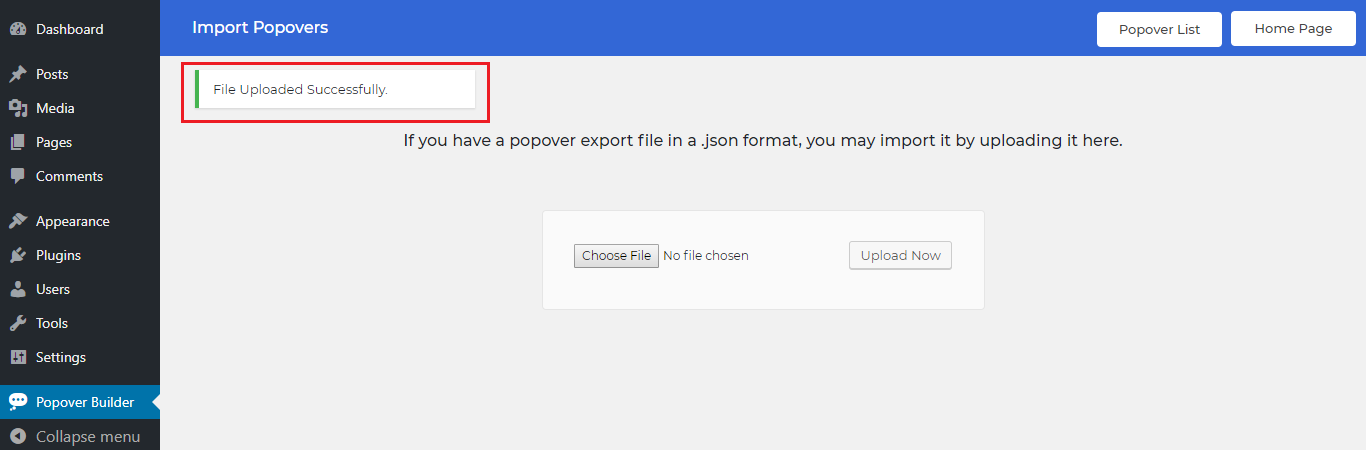
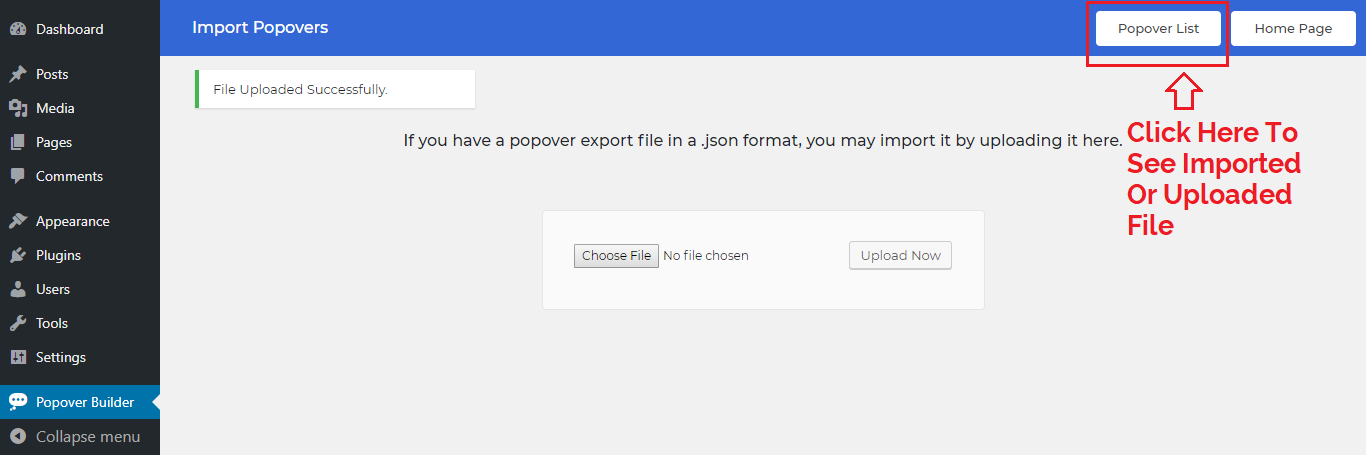
Step 3 : File Uploaded Successfully
After click on "Upload Now" button a message of successfully uploaded file will appears.
Step 4 : Open Imported Files
Now click on "Popover List" button to see imported popover.
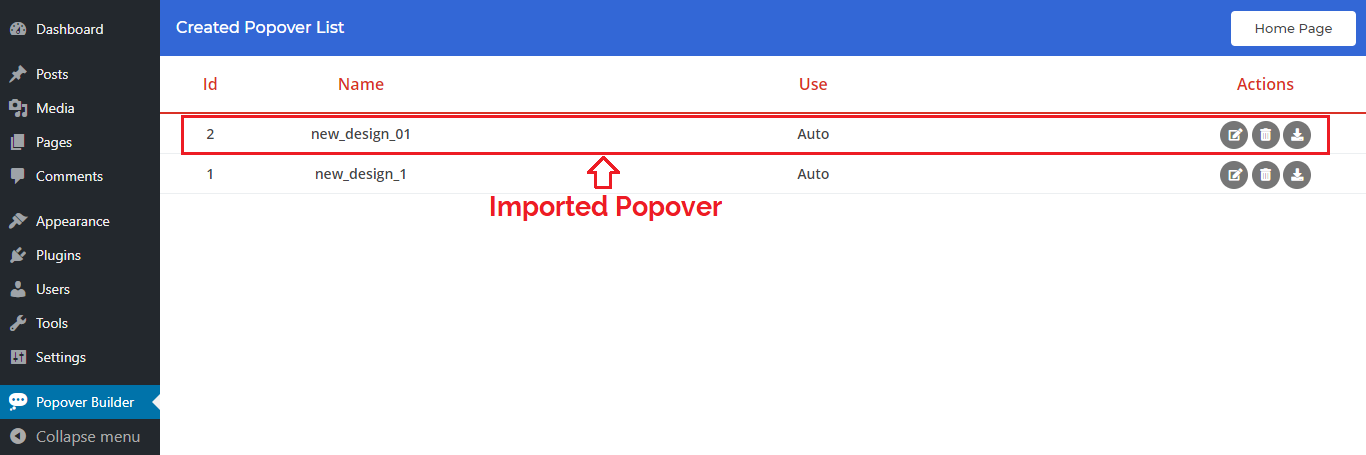
Step 5 : Popover List
Imported popovers place over all other existed popovers.
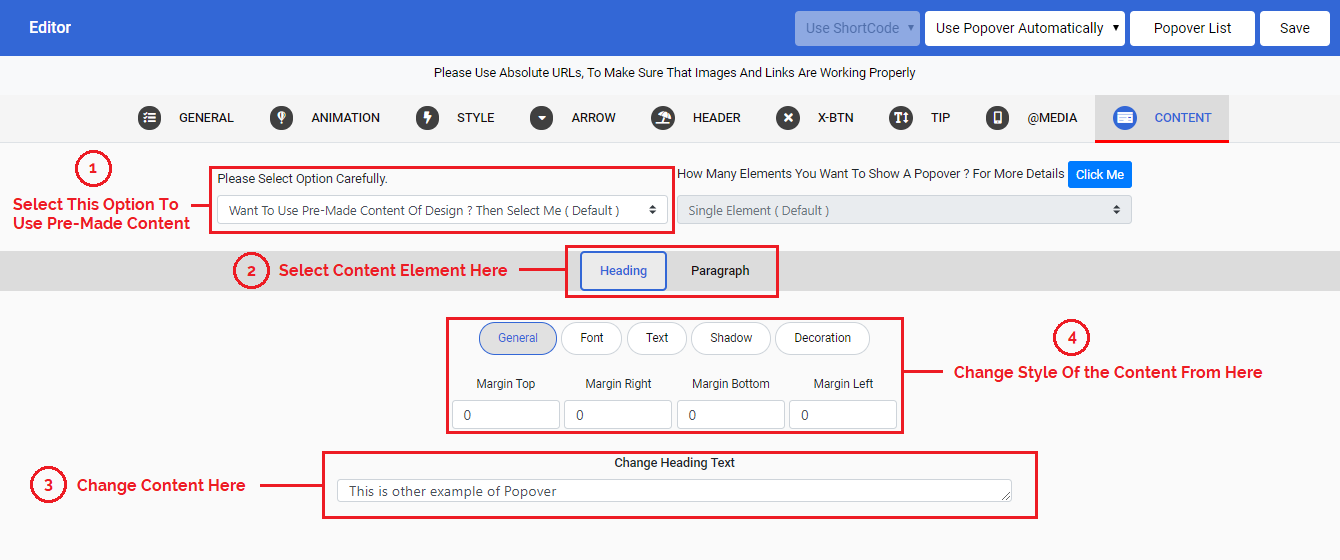
Using Pre-Made Content
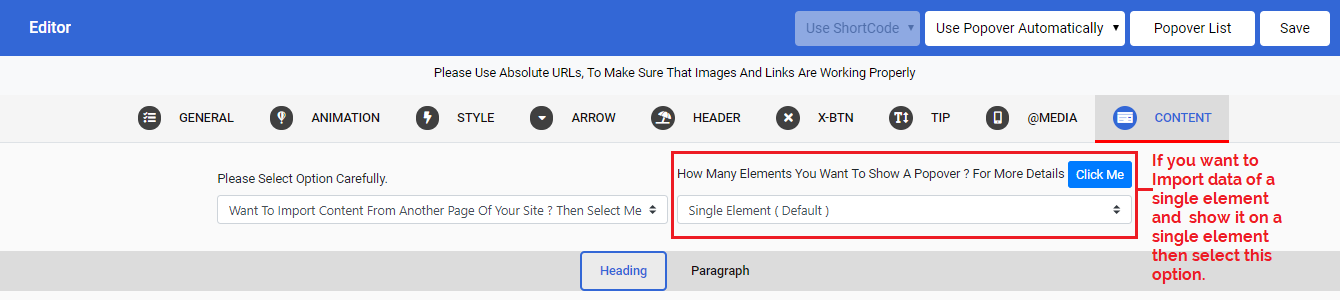
When you click on Content Tab content related options appear. If you want to use pre-made content just after replacing your own content then select Want To Use Pre-Made Content Of Design ? Then Select Me ( Default ) option
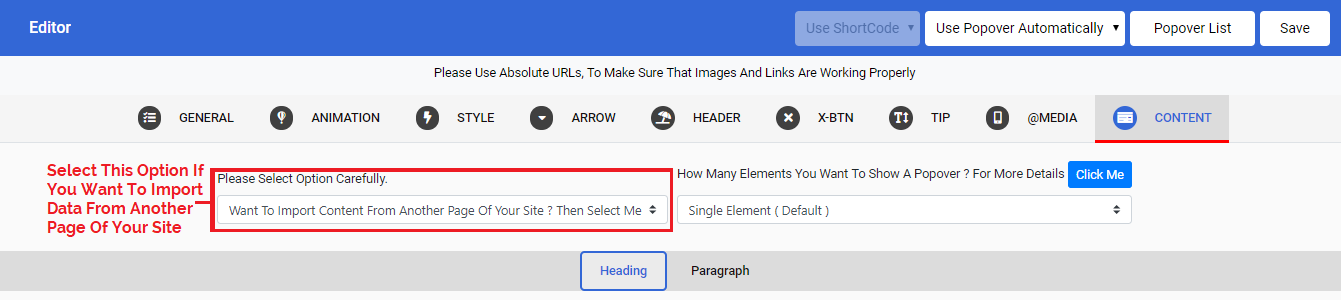
1 : Importing Content
If you want to import content from another page of your website then select Want To Import Content From Another Page Of Your Site ? Then Select Me option.
2 : Importing Single Element
If you want to import content of a single element from another page of your website and want to show that content on single element then select Single Element ( Default ) option.
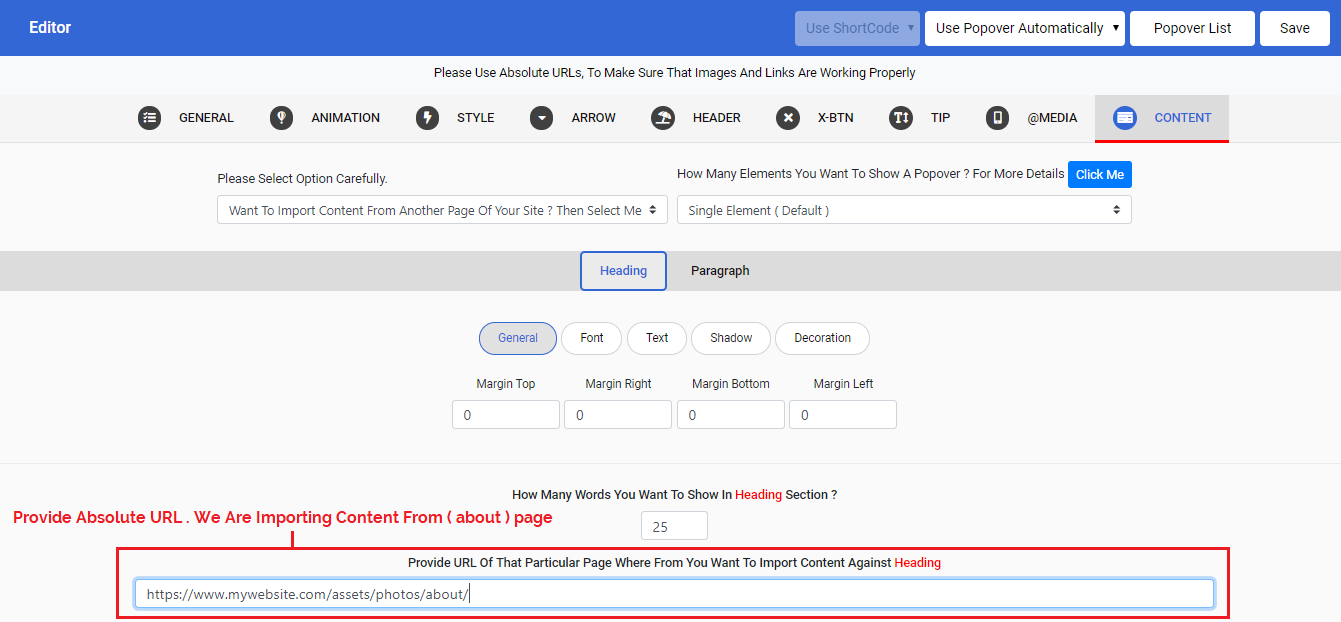
3 : Page URL Where From You Are Importing Content
To find that element in which content you want to import and show in the popover, first you must write the absolute URL of that particular page where this element exist.
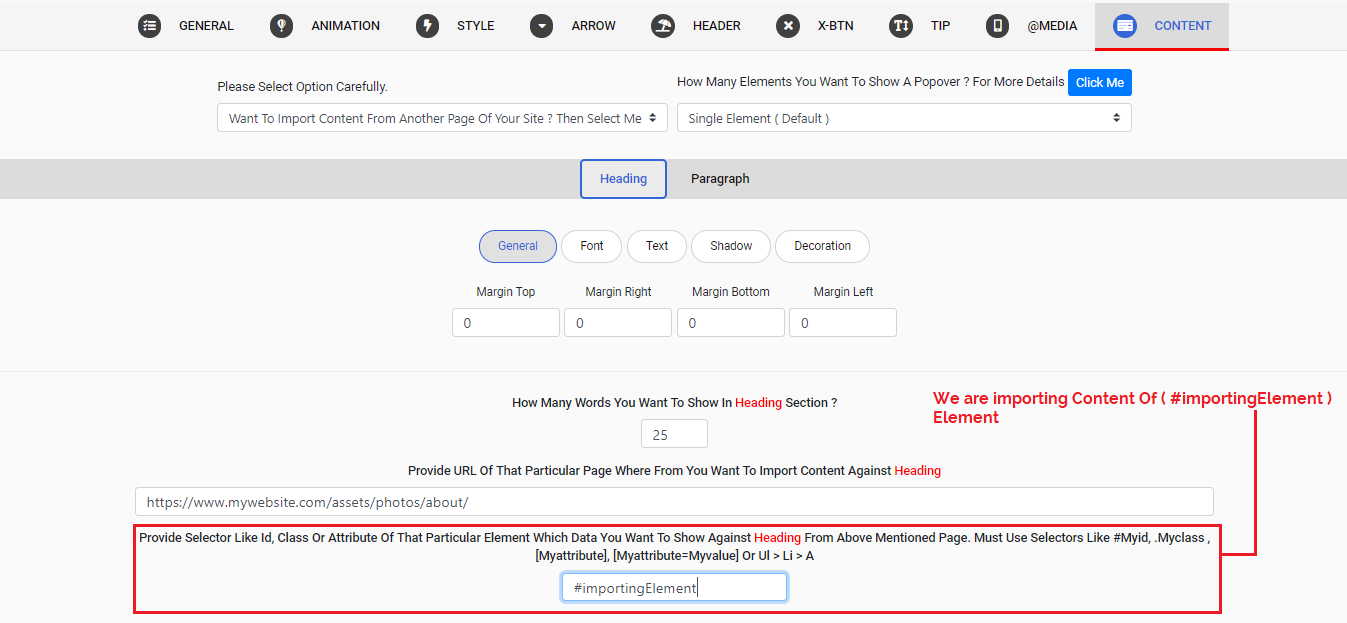
4 : How To Find Element To Import Content ?
After providing URL of that particular page where content importing element exist, now to find that element in which content you want to import and show in the popover, you must write the id, class attribute of that particular element.
5 : Problem Of Loading Content ?
Sometimes imported content show late due to different reasons like slow internet, server speed, size of content etc. To solve this issue you can make changes in animation section. You can increase Delay value of animation to solve these type of issues or increase value Show After value from general section. You can also change animation effect that is compatible.

Note : Remember always use absolute URL for images, href and buttons where required. For example use absolute URL like https://www.mywebsite.com/assets/photos/about/. Don't use relative URL like ../assets/photos/about/.
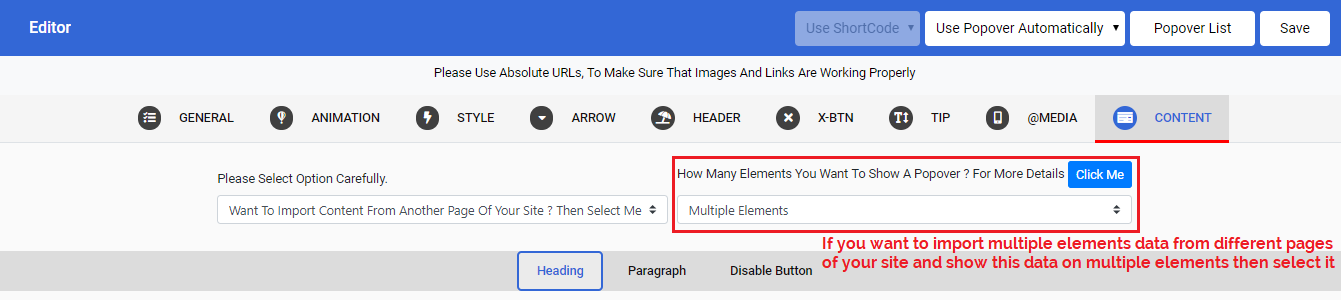
1 : Importing Content
If you want to import content from another page of your website then select Want To Import Content From Another Page Of Your Site ? Then Select Me option.
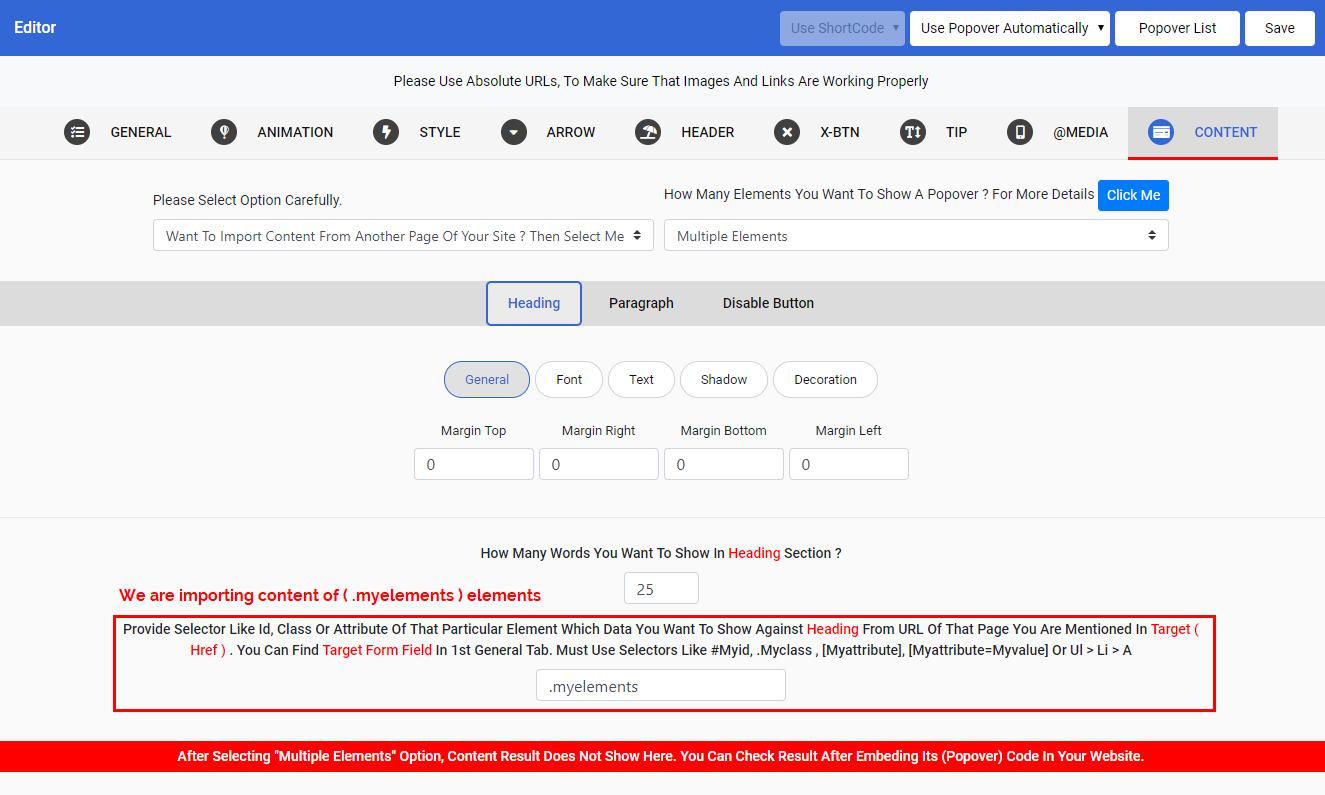
2 : Importing Multiple Elements
If you want to import content of Multiple Elements from other pages of your website and want to show those Imported Contents on Multiple Elements then select Multiple Elements option.
3 : Pages URLs Where From You Are Importing Contents
This option gets the URLs of those pages where from contents are imported, from href of Target Element.
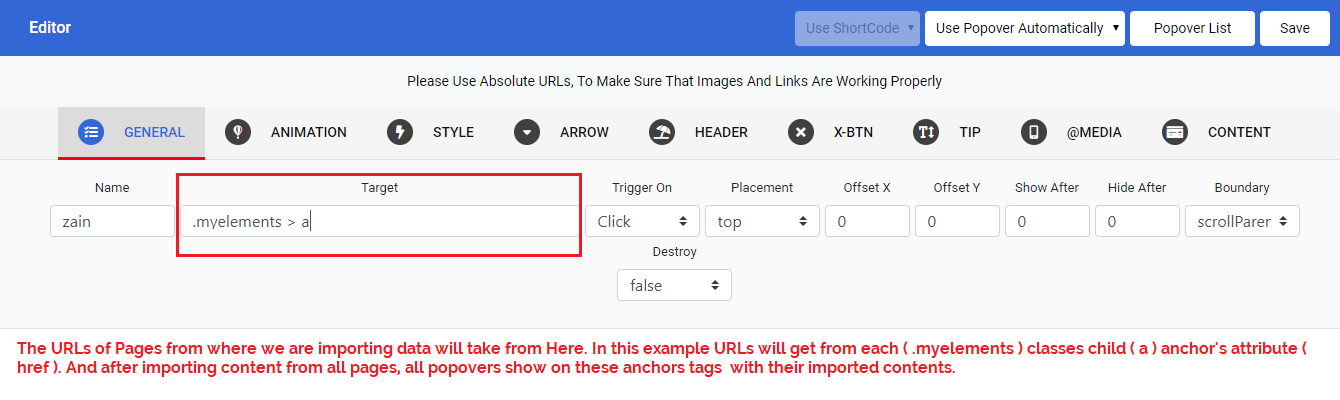
4 : How To Find Elements To Import Contents ?
Now to find those elements in which content you want to import and show in Popovers, you must write the id, class, attribute of those particular elements. These ids, classes or attributes must be same on each page where these elements existed.
5 : Problem Of Loading Content ?
Sometimes imported content show late due to different reasons like slow internet, server speed, size of content etc. To solve this issue you can make changes in animation section. You can increase Delay value of animation to solve these type of issues or increase value Show After value from general section. You can also change animation effect that is compatible.
Note : Remember always use absolute URL for images, href and buttons where required. For example use absolute URL like https://www.mywebsite.com/assets/photos/about/. Don't use relative URL like ../assets/photos/about/.
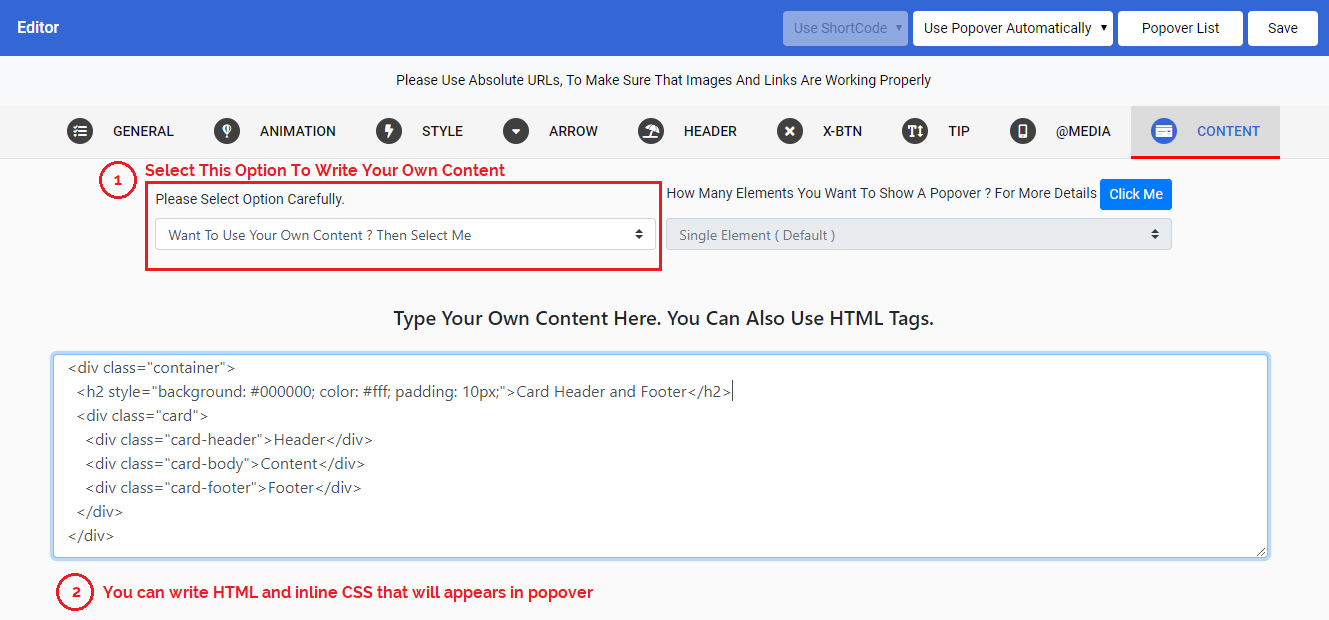
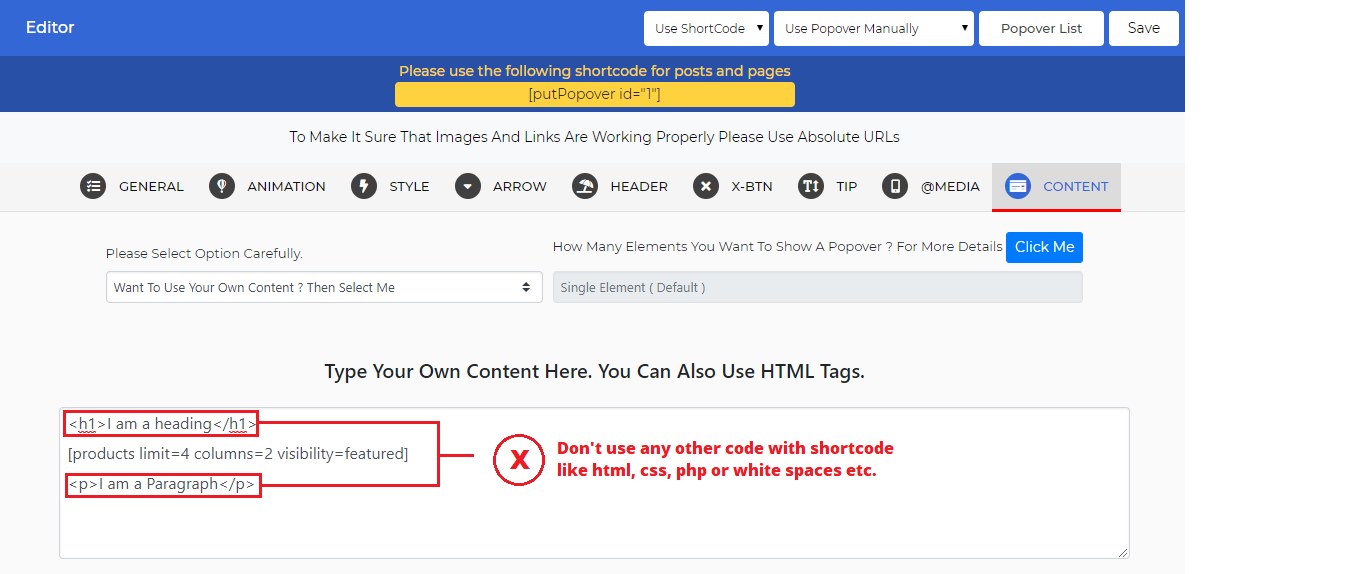
Write Your Own Content
You can write your own content for popover by selecting Want To Use Your Own Content ? Then Select Me option. You can write your own HTML and CSS according to your requirements.
Use ShortCode To Show Content
You can show content in a popover by using ShortCodes such as WooCommerce.
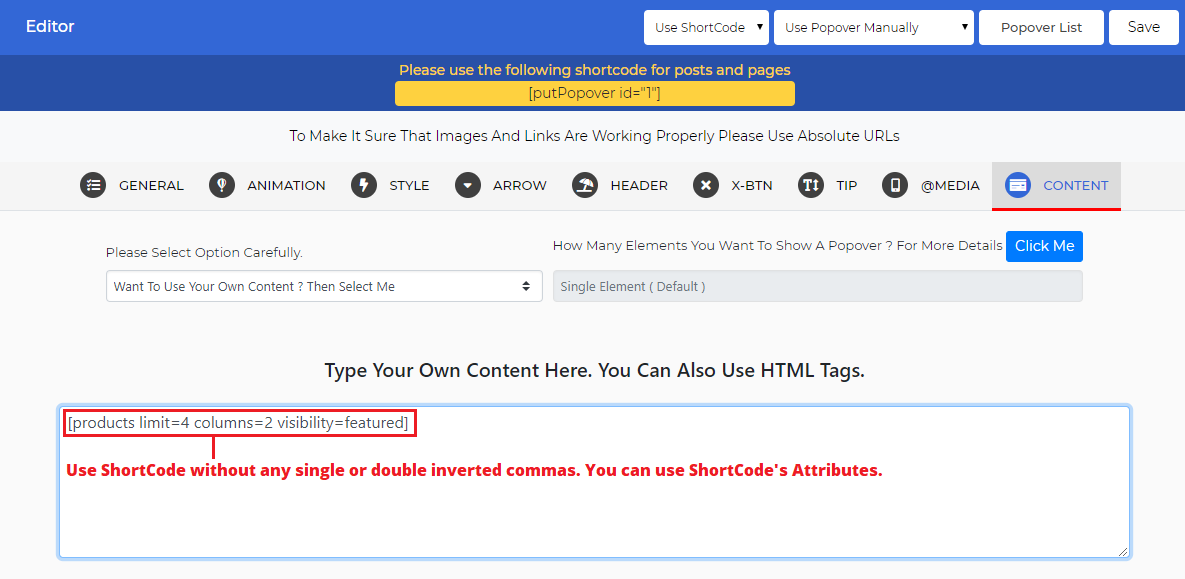
Step 1 : Where Write ShortCode ?
Click on Content Tab and select Want To Use Your Own Content ? Then Select Me option.
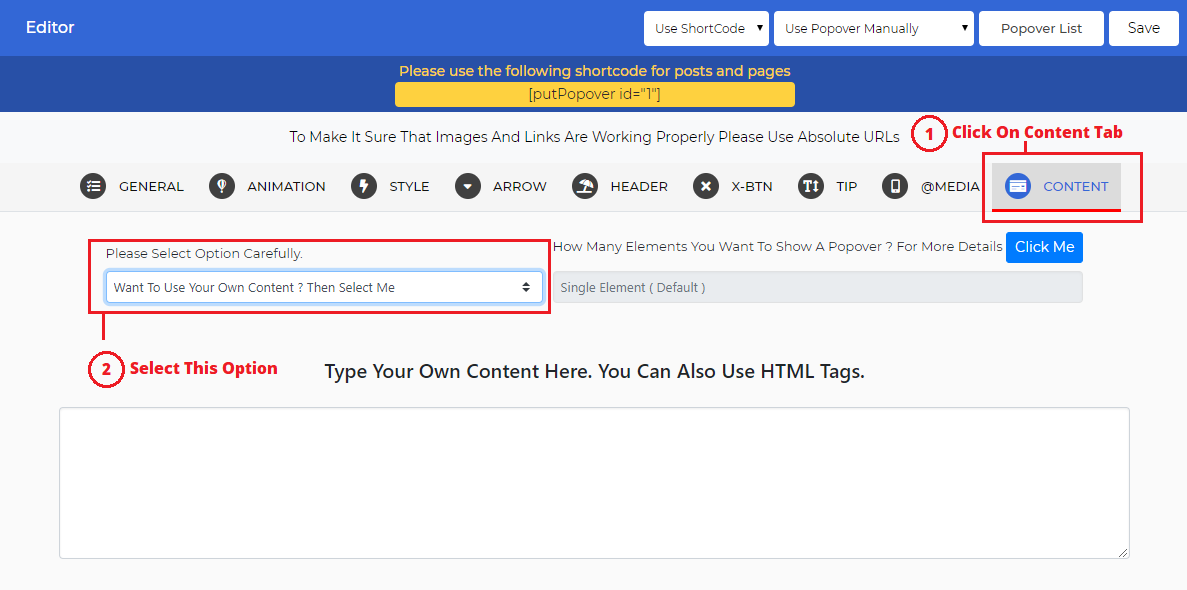
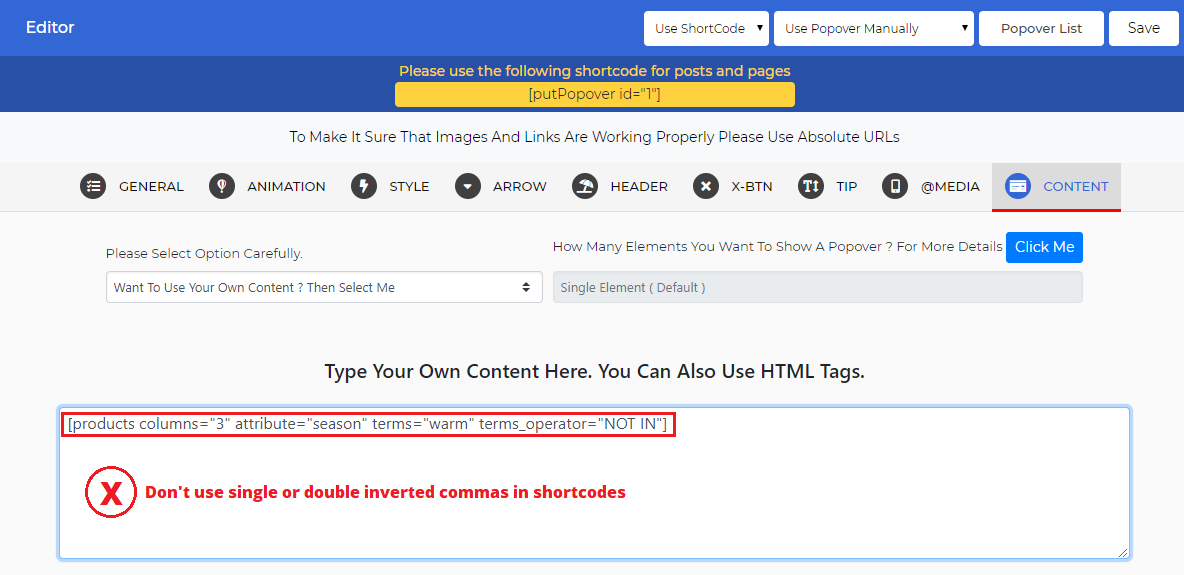
Step 2 : How To Write A ShortCode ?
Now click in textarea and write shortcode here without any single or double inverted commas.
Step 3 : How To Use A Popover That Contains A ShortCode ?
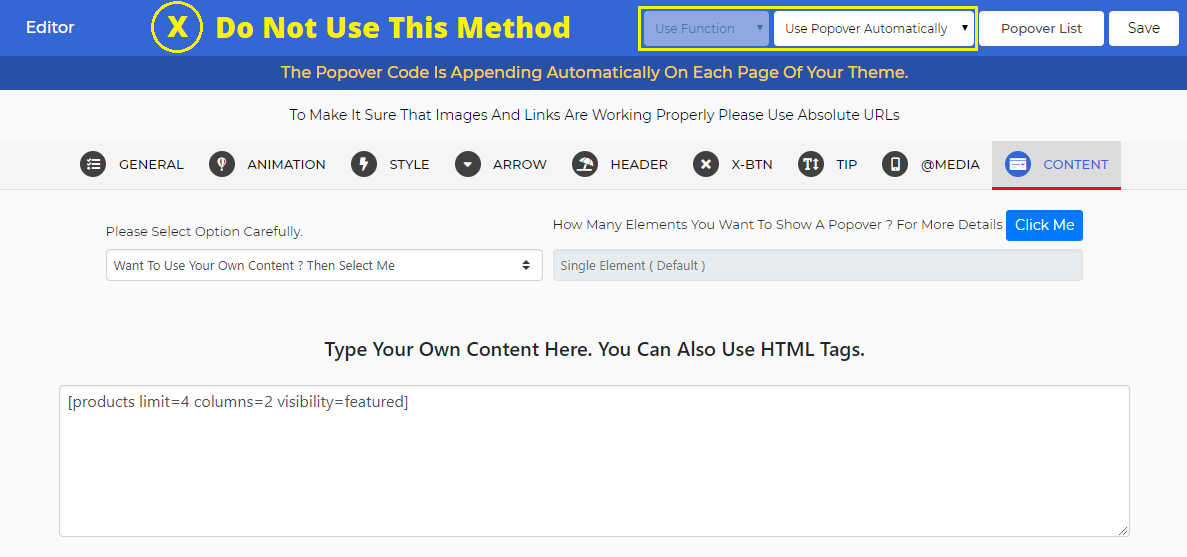
You can use popovers those contain a ShortCode only by two method.
1 : By Selecting ShortCode Method
2 : By Selecting Function (PHP) Method
For more details visit "How to Use Popover Portion".
3 : Do Not Use Automatically Method Note : Remember do not use Automatically Method to use such popovers.
Step 4 : Please Do Not Use
A : Please do not use any other Code like HTML Or CSS when you are using ShortCodes in textarea.
B : Don't use any single or double inverted commas in shortcodes.
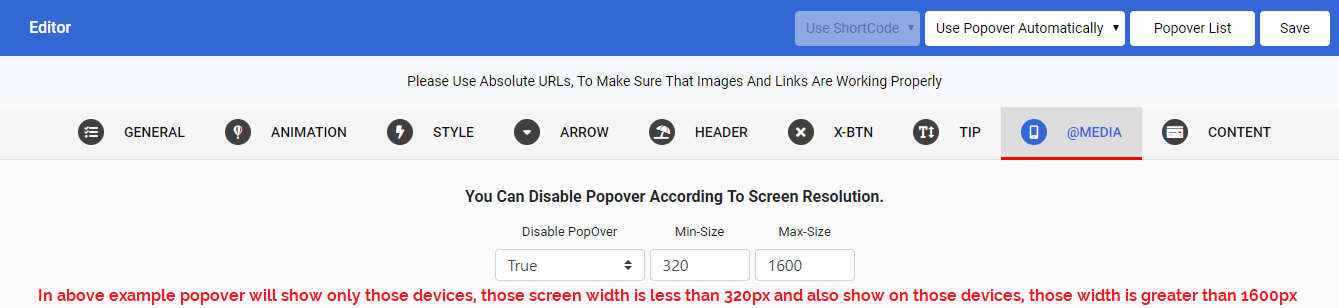
Stop Popover To Show According To Screen Size
You can disable popover according to screen sizes. For example if you want to show popover only on mobiles or small devices then you can assign exact screen size in @MEDIA Tab.
What Type Of Icons You Can Use ?
We are using Font-Awesome icons for all designs. You can change any icon by changing its class name. You can find all icons here Font-Awesome Icons.
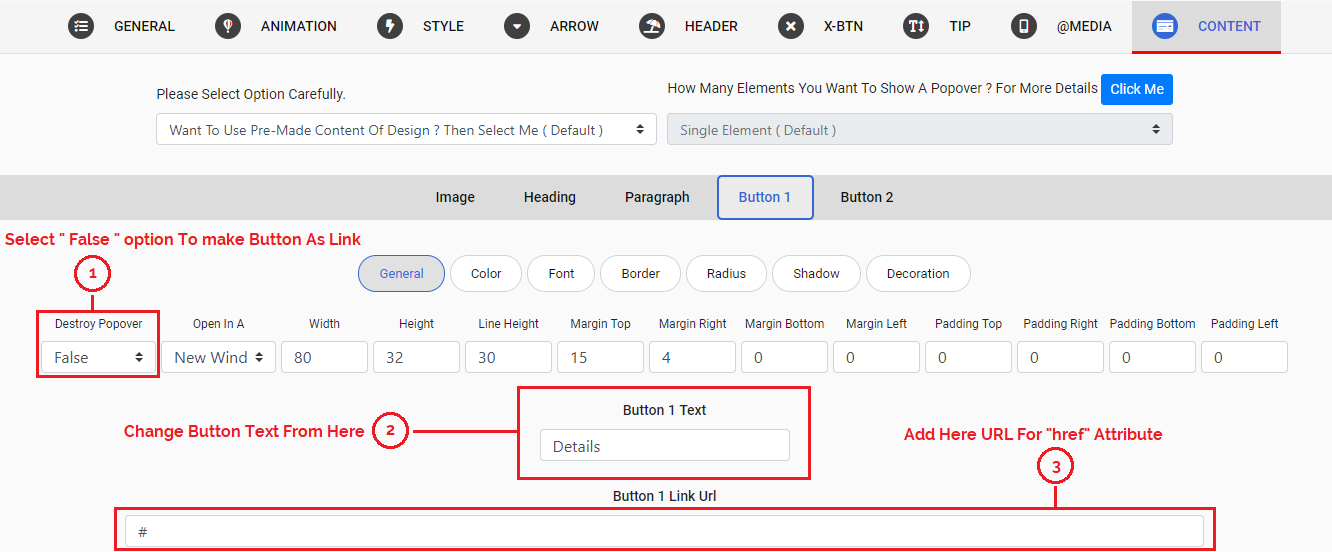
Buttons Elements
You can use buttons those we have used in designs in two ways, as link or as cancel button
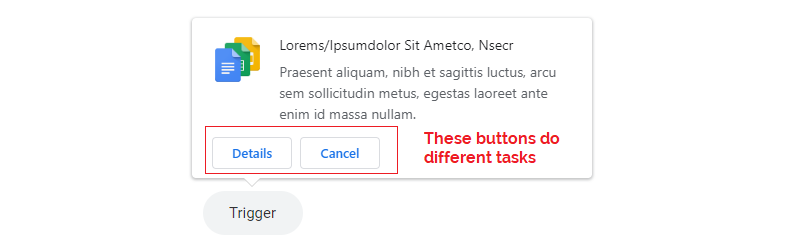
Create A Button That Contains Link Of Another Page
If you want to create a button as a link then set Destroy Popover option at false value.
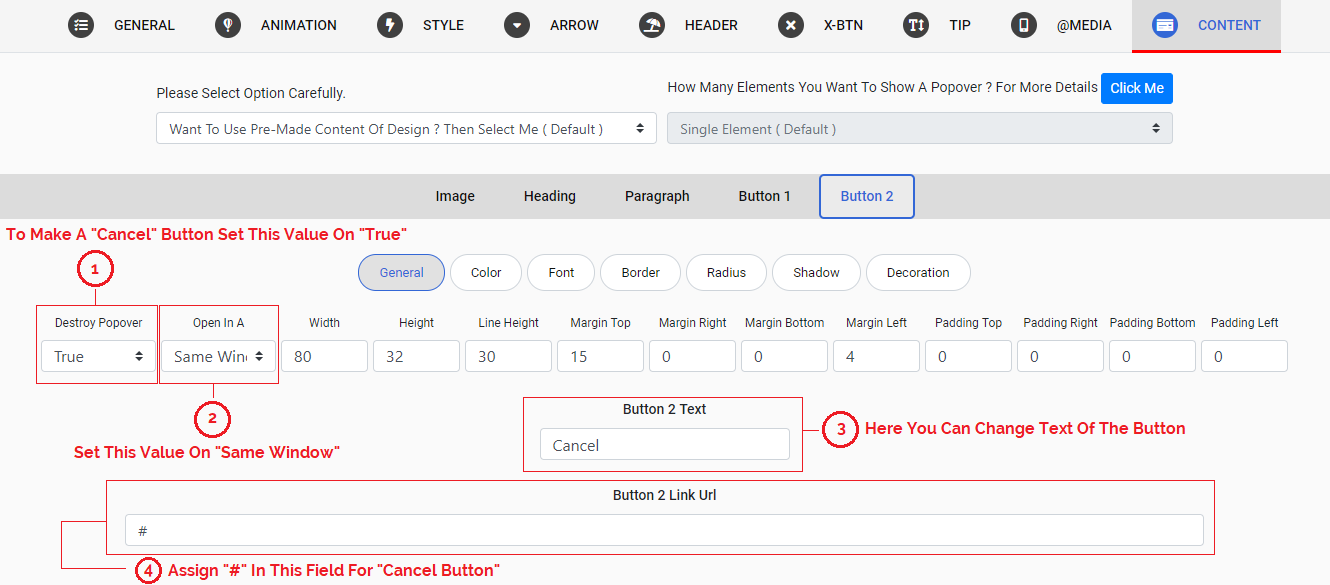
Create A Cancel Button
If you want to create a button that only work as a cancel button then set Destroy Popover option at true value. And also set Same Window value to Open In A option. Assign "#" in Link Url field.
How To Destroy Popover After Hiding ?
Sometimes we want to destroy popover after showing one time, generally when we are showing popover on page load. In this situation we make destroy function true in general tab.

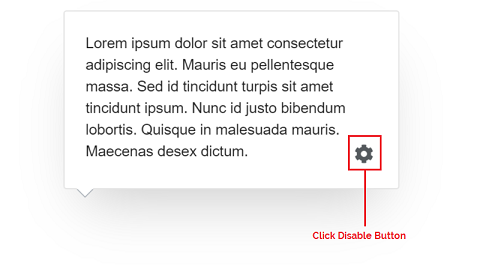
Where We Are Using Disable Buttons ?
When we are importing data or content by selecting multiple option then disable button appears in bottom and right corner of the popover. Sometimes a visitor of the site want to stop Popovers to appear or show due to different reasons then this button helps the visitor.

Step 1
Click on Disable Button
Step 2
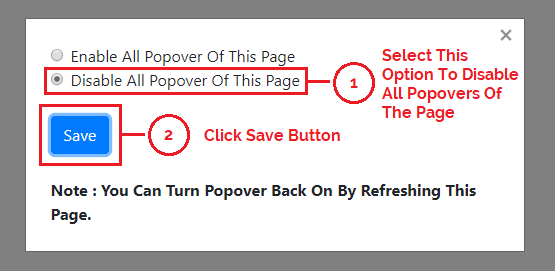
After clicking Disable Button a modal will appears.
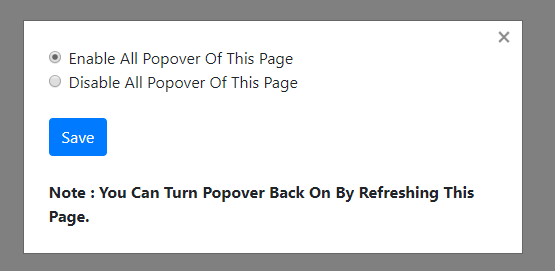
Step 3
If you want to disable Popovers from a page then select Disable All Popover Of This Page option and click on save button.
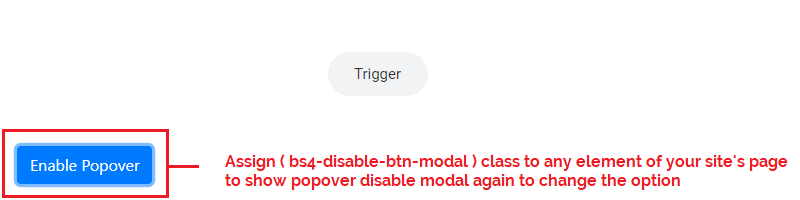
How To Enable Popover Again After Disabling ?
To make Popovers enabled you must assign a class name bs4-disable-btn-modal to any element on your site's page that will show disable popover modal again. You can assign this class to any already created elements like a, p, span, img, button etc. Or you can create new one for this purpose.
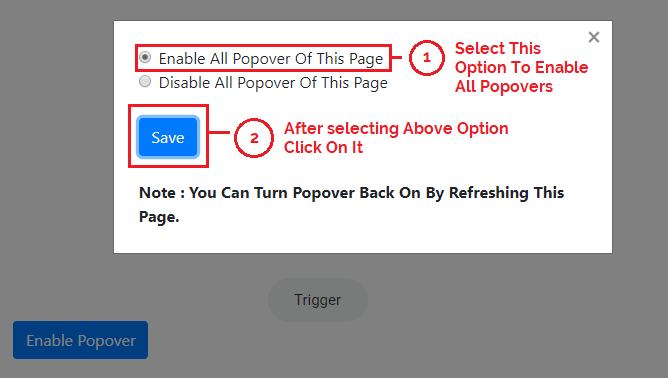
After click on bs4-disable-btn-modal class element popover disable modal appears again now select Enable All Popover Of This Page option and click the save button. This will make enable all Popovers again.
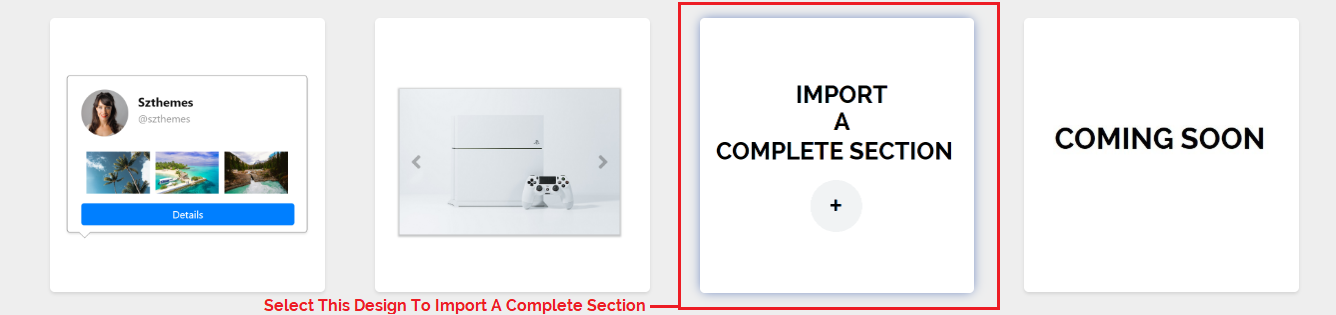
Import A Complete Section From Another Page
You can import a complete section from another page of your site. This will import all html tags with ids, classes and attributes of that section. It also import in-line CSS of all elements of imported section.
Step 1
Go to your CodeCanyon account and, in the download section and download popover plugin again.

Step 2
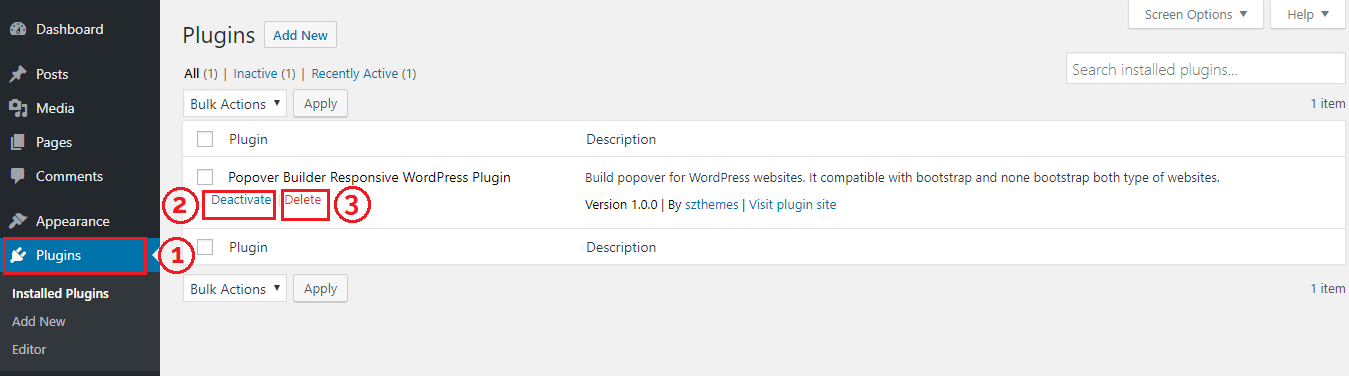
Go to Plugins menu from WordPress dashboard and delete plugin after deactivating it.
Step 3
Now again follow the instructions of "Installation" section of documentation to re-install the plugin.
