Bus Rush - Subway surfers Multiplayer
Thank you
Your First Section Title
RESKIN Bus Subway
(For developers)
A) Project introduction.
- The project is a running game. The style is synthesized from Bus Rush and Subway Surfer games. Expanded with many other functions such as online mode, map transfer, share video ...
- You need to open the project on Unity 5.6 or latest. (I suggest using 5.6.1f1)
- The project supports 2 types of ads: Admob or Chartboost. You need their account (Described in detail below).
- You need a VPS server to run rankings, missions / challenge online (Described in detail below).
- You need a Photon account to run the online function (Described in detail below).
- You need a EveryPlay account to run the share video game function (Described in detail below).
- You need a Facebook Developer account to run login functions, share facebook, rank, invite friends ... (Described in detail below).
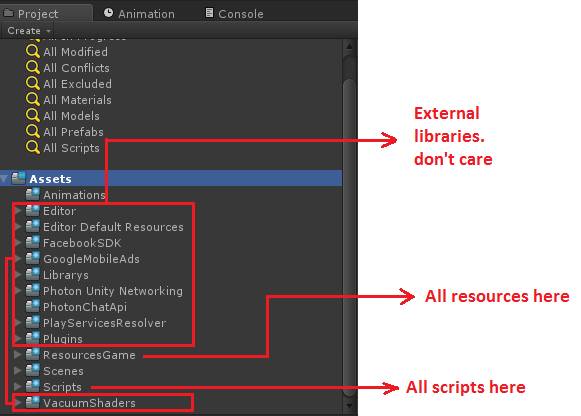
B) Structure of the project.
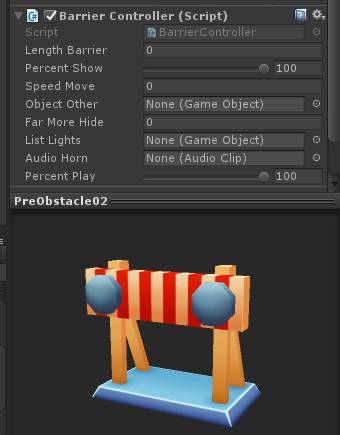
1) All obstacles appear on the road.
- They are obstructing items such as trains, buses, fences, traffic lights ...
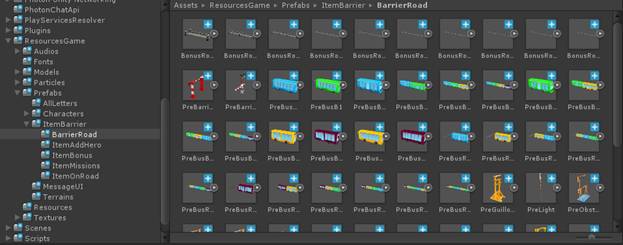
Each obstacle has many attributes such as:
Length of obstacle, rate of occurrence, speed of movement (for obstructions such as train/ bus)
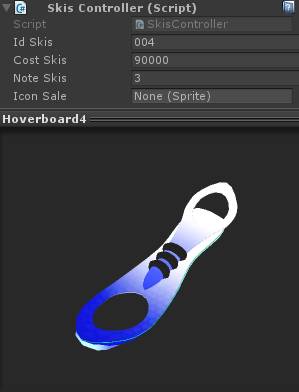
2) All items are equipped for the character.
- They are items attached to the character when using items such as Jetpack, Hoverboard, HoverBike, Magnet ...
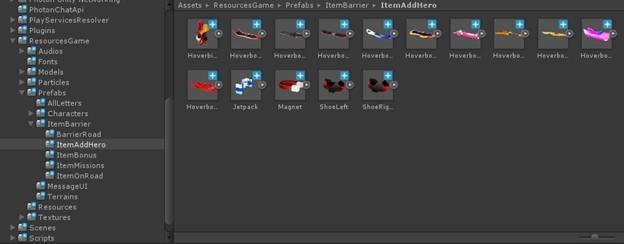
- You can edit the price, information of items equipped for character here.
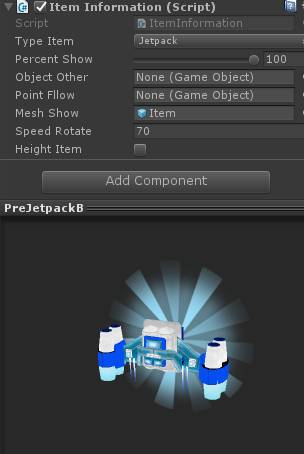
3) All items appear on the road.
- They are items that players can pick up on the road such as: Coins, Keys, Jetpack, Hoverbike, Magnet, Sneaker ...
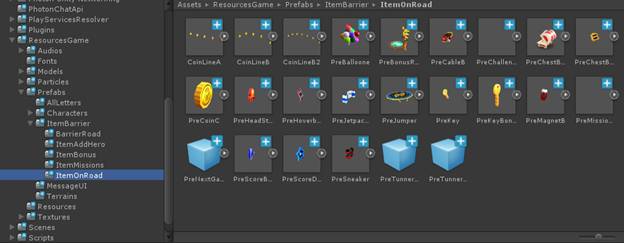
- You can adjust the rate of appearance, Items appear instead ...
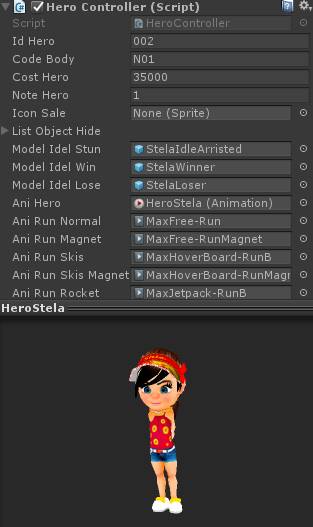
4) All characters in the game

- Each character has a "Hero Controller" component.
This component controls everything of the character.
You can change information, price, animations ... of character here.
C) How to Add/ Edit character.
1) Requirements:
- Character model (Note the size of the characters, let's size them like our characters).
- Bones for the character (The names of the bones need to resemble the bones of our character)
- No animation needed.
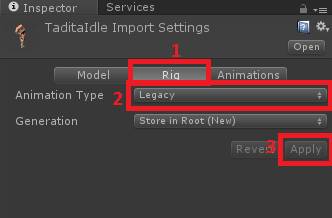
2) Steps taken
- Import new characters (including skeletons) into the folder Assets => ResourcesGame => Models => Characters
- Set animation style as image.
- Drag the model into hierarchy, add the following objects.
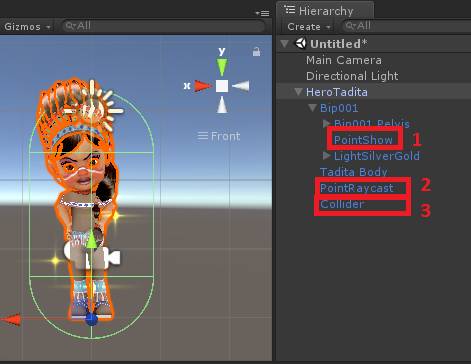
(Be sure to set their properties as the object of the old character)
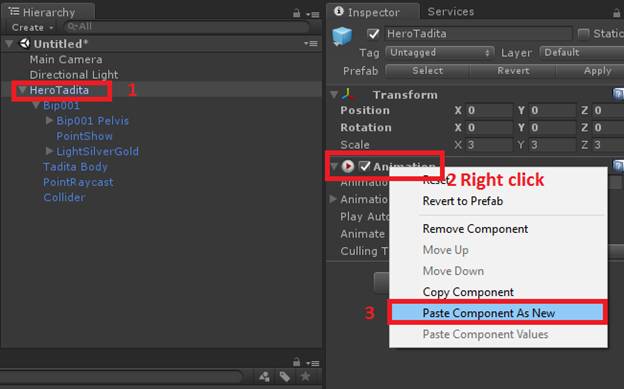
- Next, copy and paste the components of the old character into the new character.
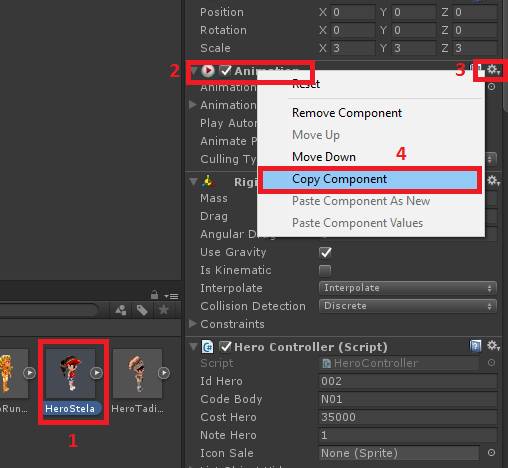
(If component is available then you select "Paste Component Values"
Otherwise select "Paste Component As New")
- Next, drag the new character to Assets => ResourcesGame => Prefabs => Characters to create prefabs for this character. Then adjust the attributes necessary for this character such as ID, Name, Price ... (Refer to the old characters)
- Finally, you will add a new character here
(Note: You still need to refer to the old character prefabs to understand the function. If you have any problems, please contact us for assistance)
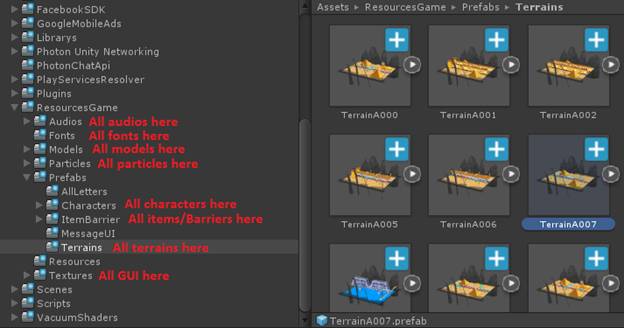
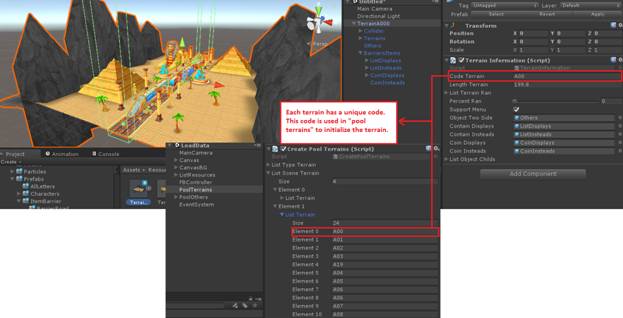
D) How to Add/ Edit terrain.
1) Requirements:
- Environmental model – Terrain (Note the size of the terrains, let's size them like our terrain).
- Obstructions and items (You can replace it or use old obstructions / items)
2) Steps taken
- Import new characters (including skeletons) into the folder Assets => ResourcesGame => Models => Terrains => Environments
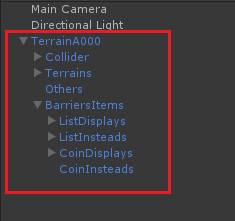
- Drag the terrain model into hierarchy, add the following objects.
+ Colliders is object that contain BoxCollider.
+ Terrains is object that contains the environment model.
+ ListDisplays is object that contain Items/ Obstructions appear in this terrain
+ ListInsteads is object containing Items/ Obstructions that are replaced when the Items/ Obstructions in the ListDisplays object are not displayed.
+ CoinDisplays and CoinInsteads are similar to ListDisplays and ListInsteads
- Drag and drop the Items/ Obstacles you want into the corresponding GameObjects and adjust the position.
- Note that. Each terrain has a unique code, you need to declare this code in the component "Terrain information". This code will be used in the "Create pool terrain" component. It will connect the terrain to an infinite path.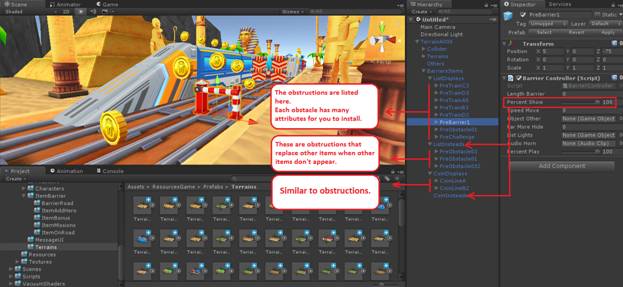
- Next, drag the new terrain to Assets => ResourcesGame => Prefabs => Terrains to create prefabs for this terrain.
(You should refer to the old terrain for more details, You can copy/ paste objects in the terrain when building a new terrain, then adjust the necessary things. Doing so will help you save your time arranging terrain.).
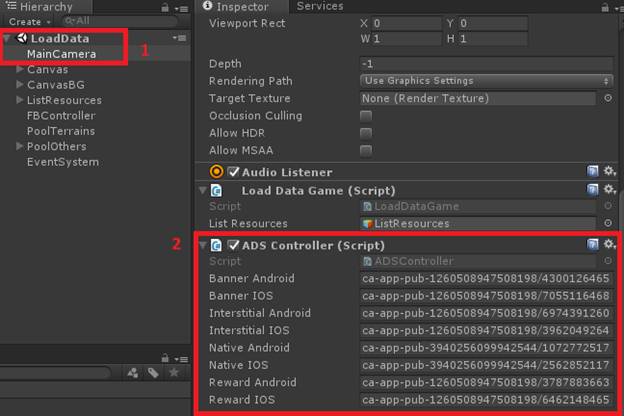
E) Configure accounts.
Game ads are displayed at the following times:
- After every two falls will appear Interstitial ads.
- Click on the Hoverboard Award, Keys, Double Coins will appear video ads (Reward Ads)
1) Enter your AdMob ad IDs here.
- If you want to have ads admob. You need to enter the advertising ID here.
To get an ID, you need to create an Admob account at https://www.google.com/admob/.
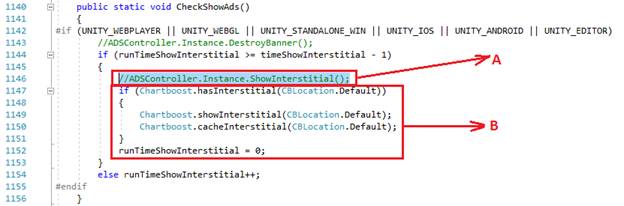
- The code version is installing the default Chartboost ad. so. If you want AdMob ads to show, then you need to fix the following scripts: Modules.cs, CooldownKey.cs, CooldownSkis.cs, PageAchievement.cs, HeroController.cs
by replacing line A with line B.
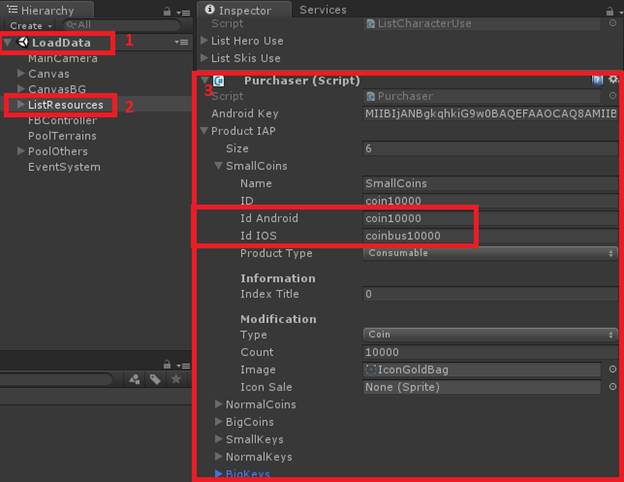
2) Enter your Product IDs here (IAP- Android and IOS).
- The project is using Unity's available IAP.
You need to create ID product in your stores (Google Play Store, App Store) and then configure it here.
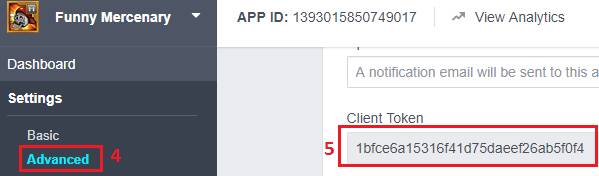
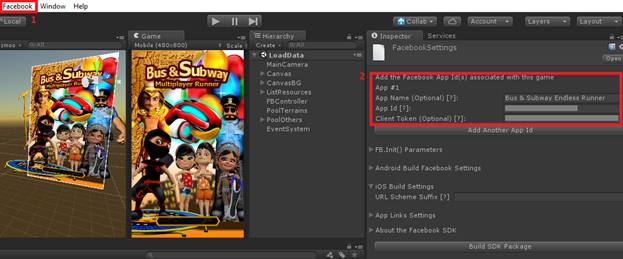
3) Configure facebook here.
- You need to create a facebook developer account here: https://developers.facebook.com
- Create an application in this facebook account.
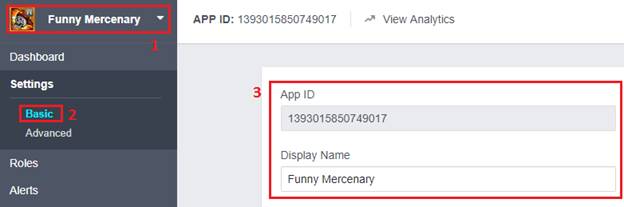
- Copy the information in (3) and (5) to the following location.
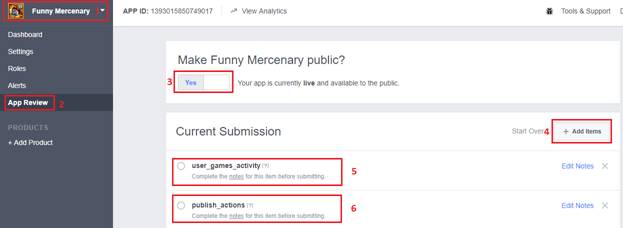
- Now you can configure your facebook account, but it doesn’t work ranking function.
To make the ranking function can work. You need permission from facebook.
And you need the following permission.
publish_actions and user_games_activity
Make sure your application is Public.
The permissions you request from facebook will probably take from 3 to 10 days for facebook to review.
When your permissions are confirmed. The whole function related to Facebook will work.
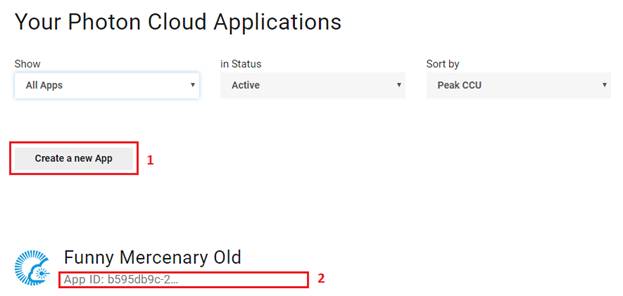
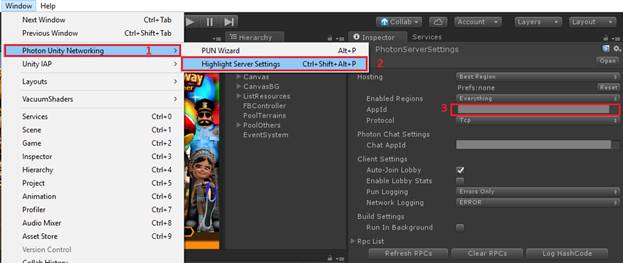
4) Configure Photon here.
- If you don’t have a Photon account, you can go here to create an account: https://www.photonengine.com/en-US/Photon
- Create an application in your Photon account, then copy the application ID
- Paste your application ID here.
- Your application ID is free, it only supports up to 20 CCU, You can upgrade your app to be able to serve multiple players.
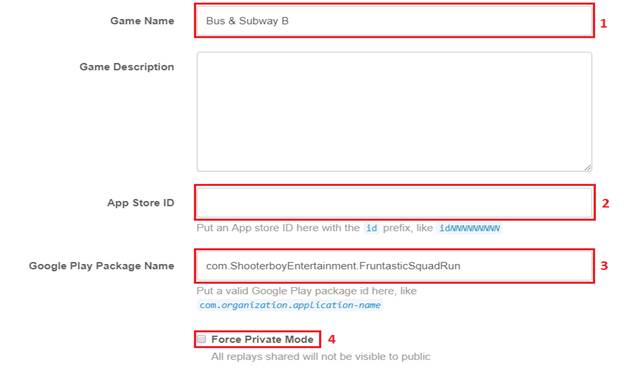
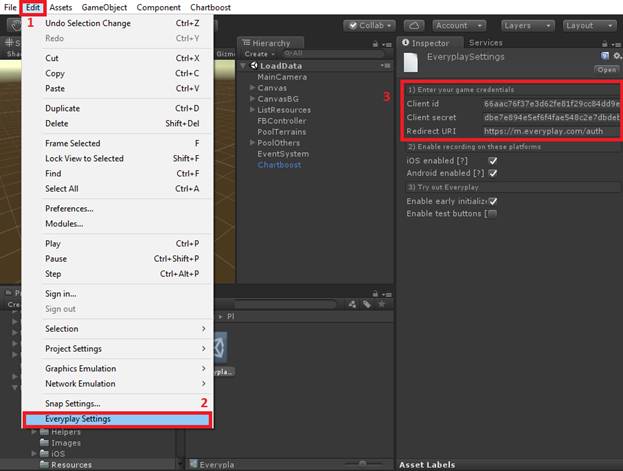
5) Configure EveryPlay here.
- Create a EveryPlay account at: https://developers.everyplay.com/
- Create a new application.
- Enter the above information. If you don’ have a package on iOS then you can skip it. Note untick Force Private Mode

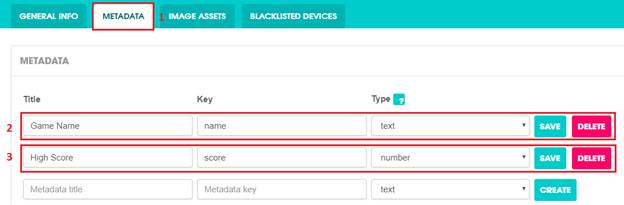
- Please fill exactly this in your EveryPlay account.
- Copy / paste the code above into this position.
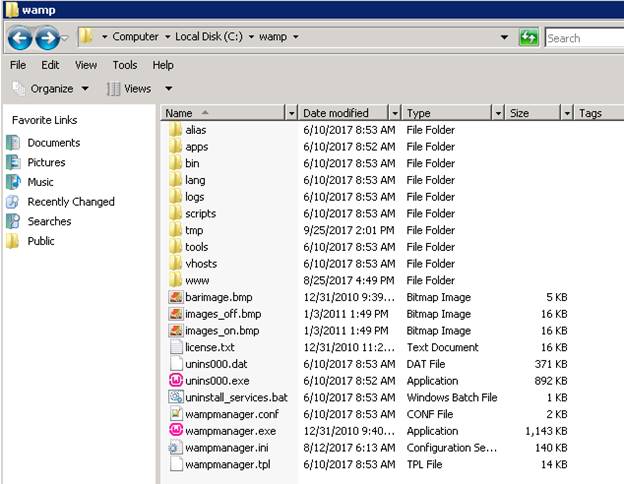
6) Install VPS.
- Register a VPS server (you can use google or amazon service).
- Install WAMP server on VPS server.

- Unzip the file "Others.rar" and copy to the www directory
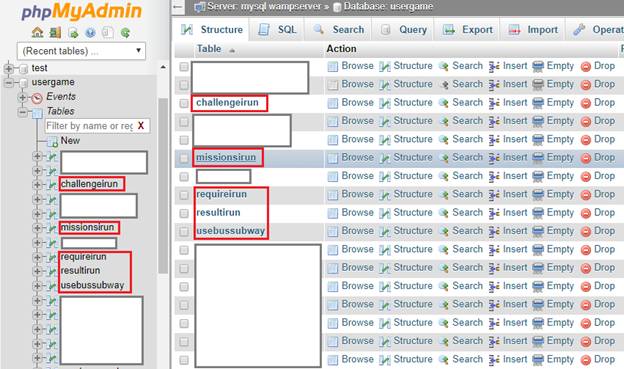
- Import the usergame.sql file into the Database.
- Edit the link in the Modules.cs script
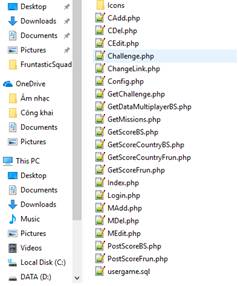
- Open the file "ChangeLink.php" in the "Others" folder to change the Share link.
